Background Information
The module used to display and showcase students is called Filterable Portfolio. We used this component because we want the list of students to be searchable and filterable by their major. In addition, we added some custom styling to fit our purpose.
The Filterable Portfolio component works with the Project component of Divi and thus, we used Project component to make it easy to add or remove students from the ePortfolio Showcase as well.
To add/remove students from the showcase, follow the steps below:
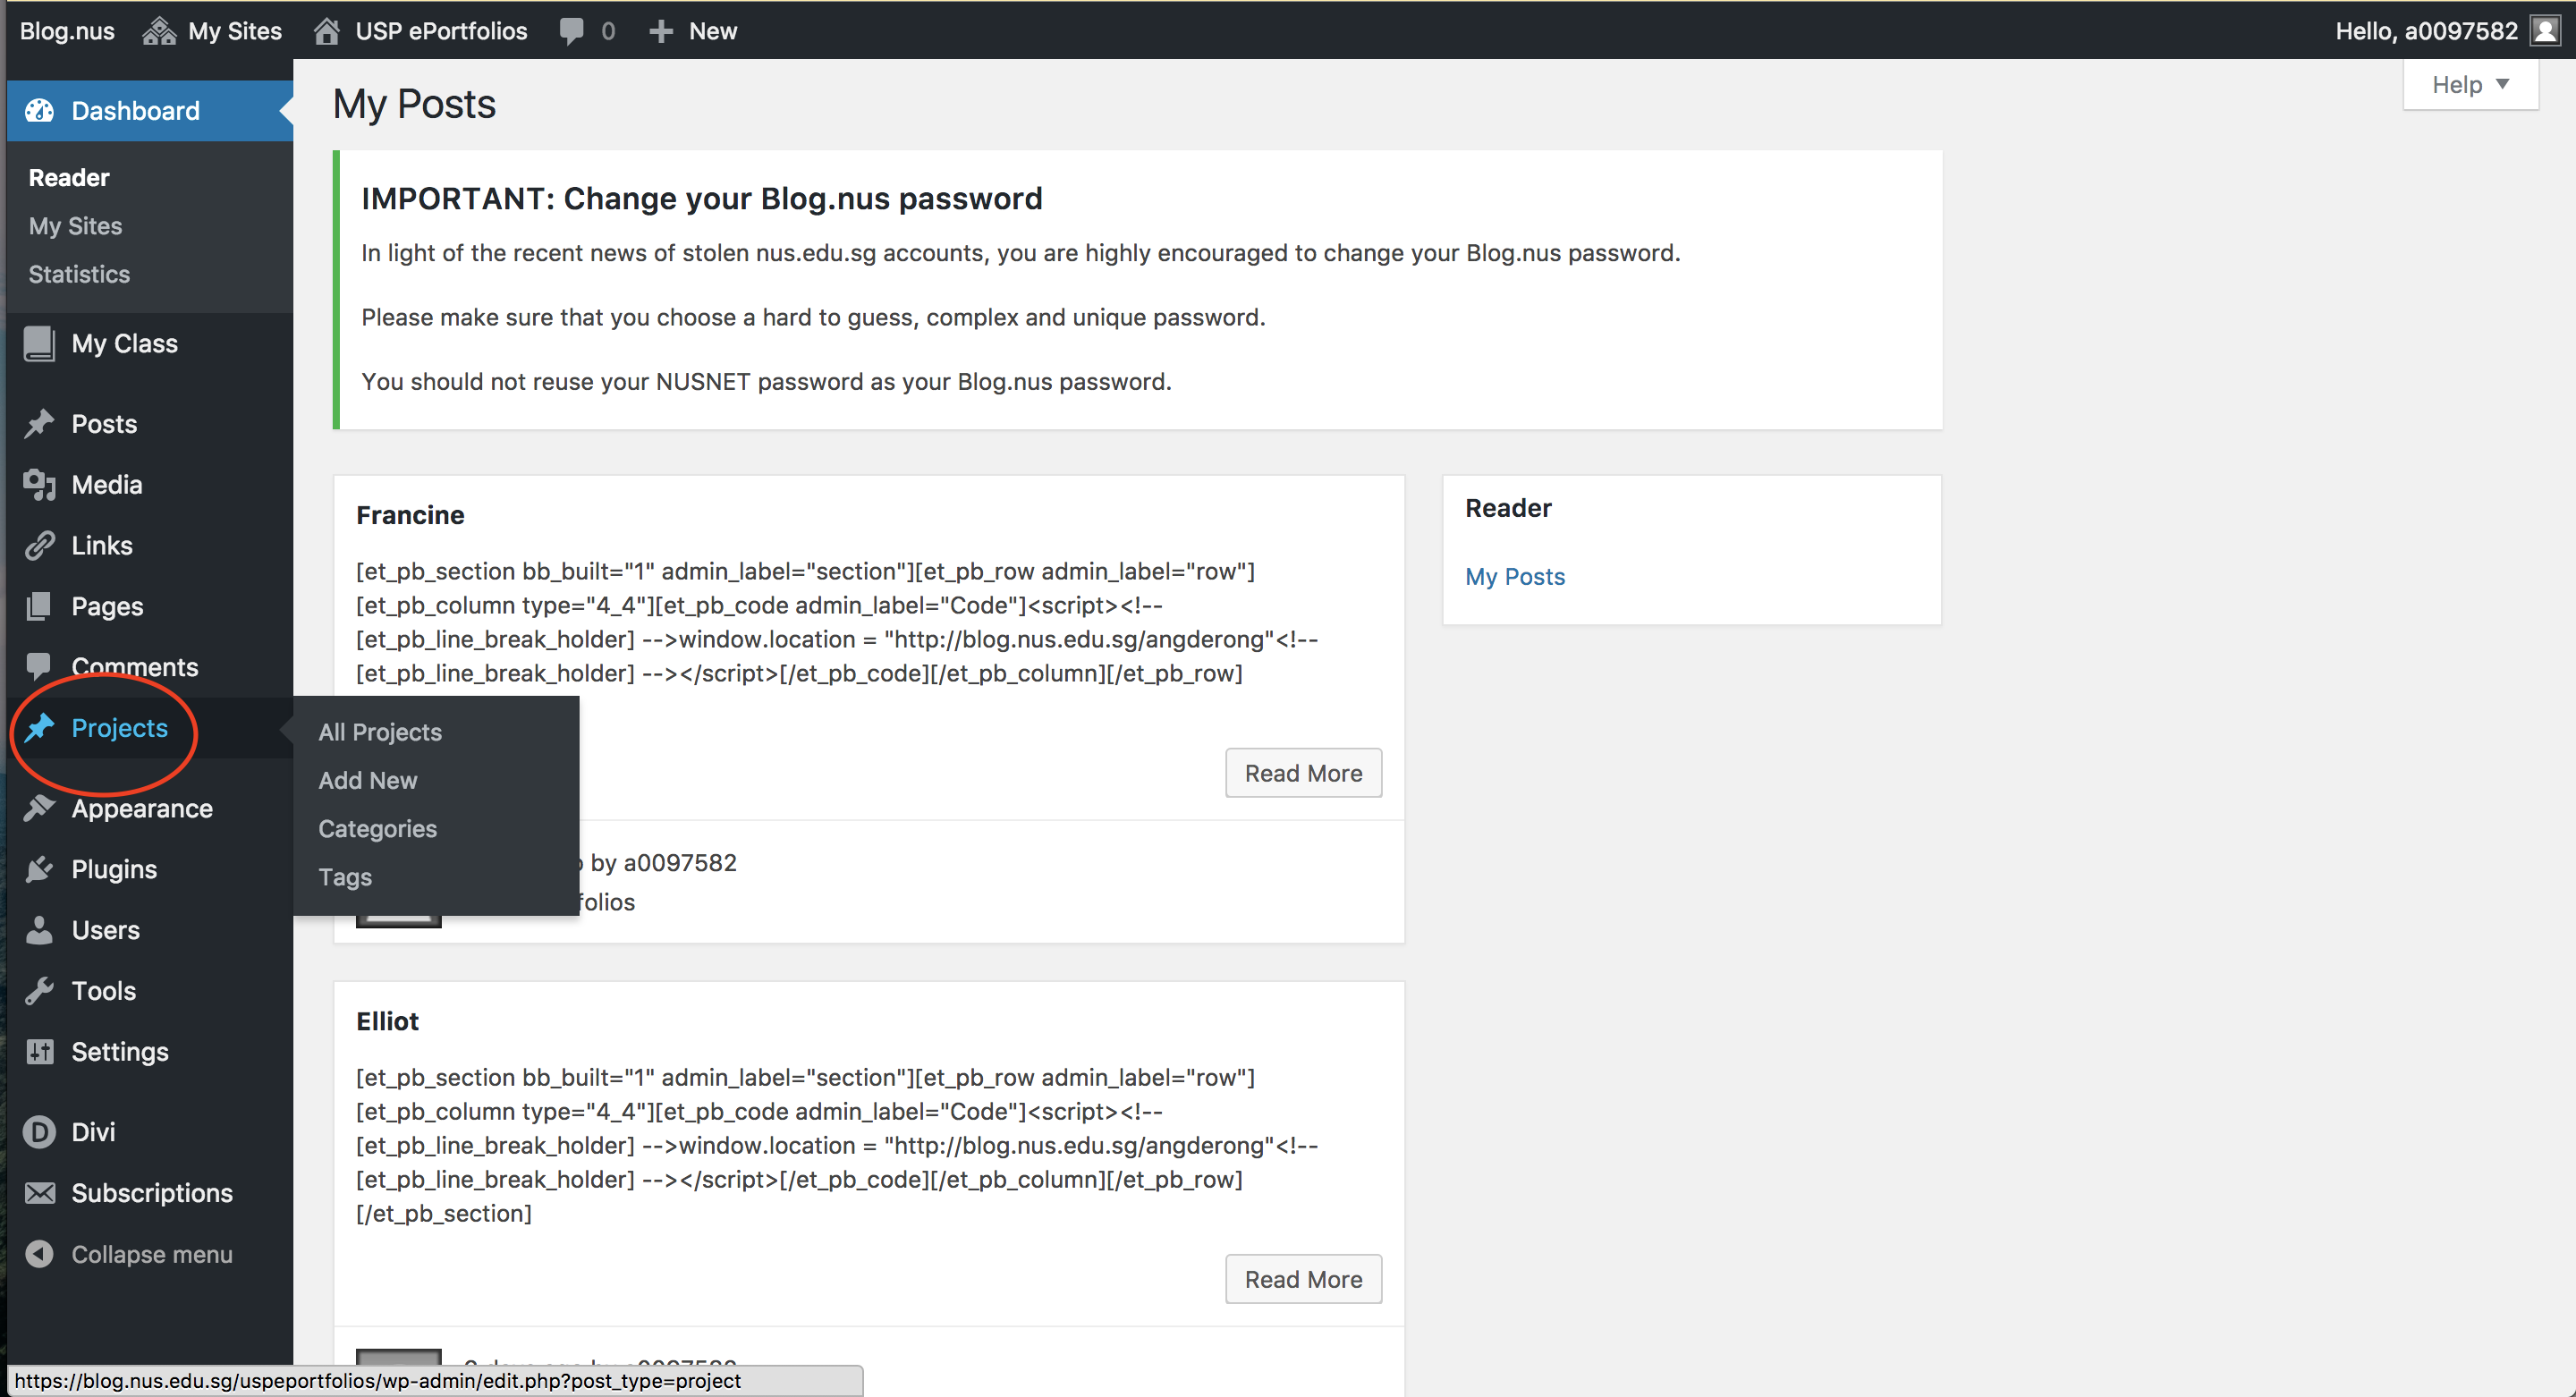
Step 1. From the dashboard of the site, click Project from the sidebar to view all projects. Each student in the showcase is 1 project.
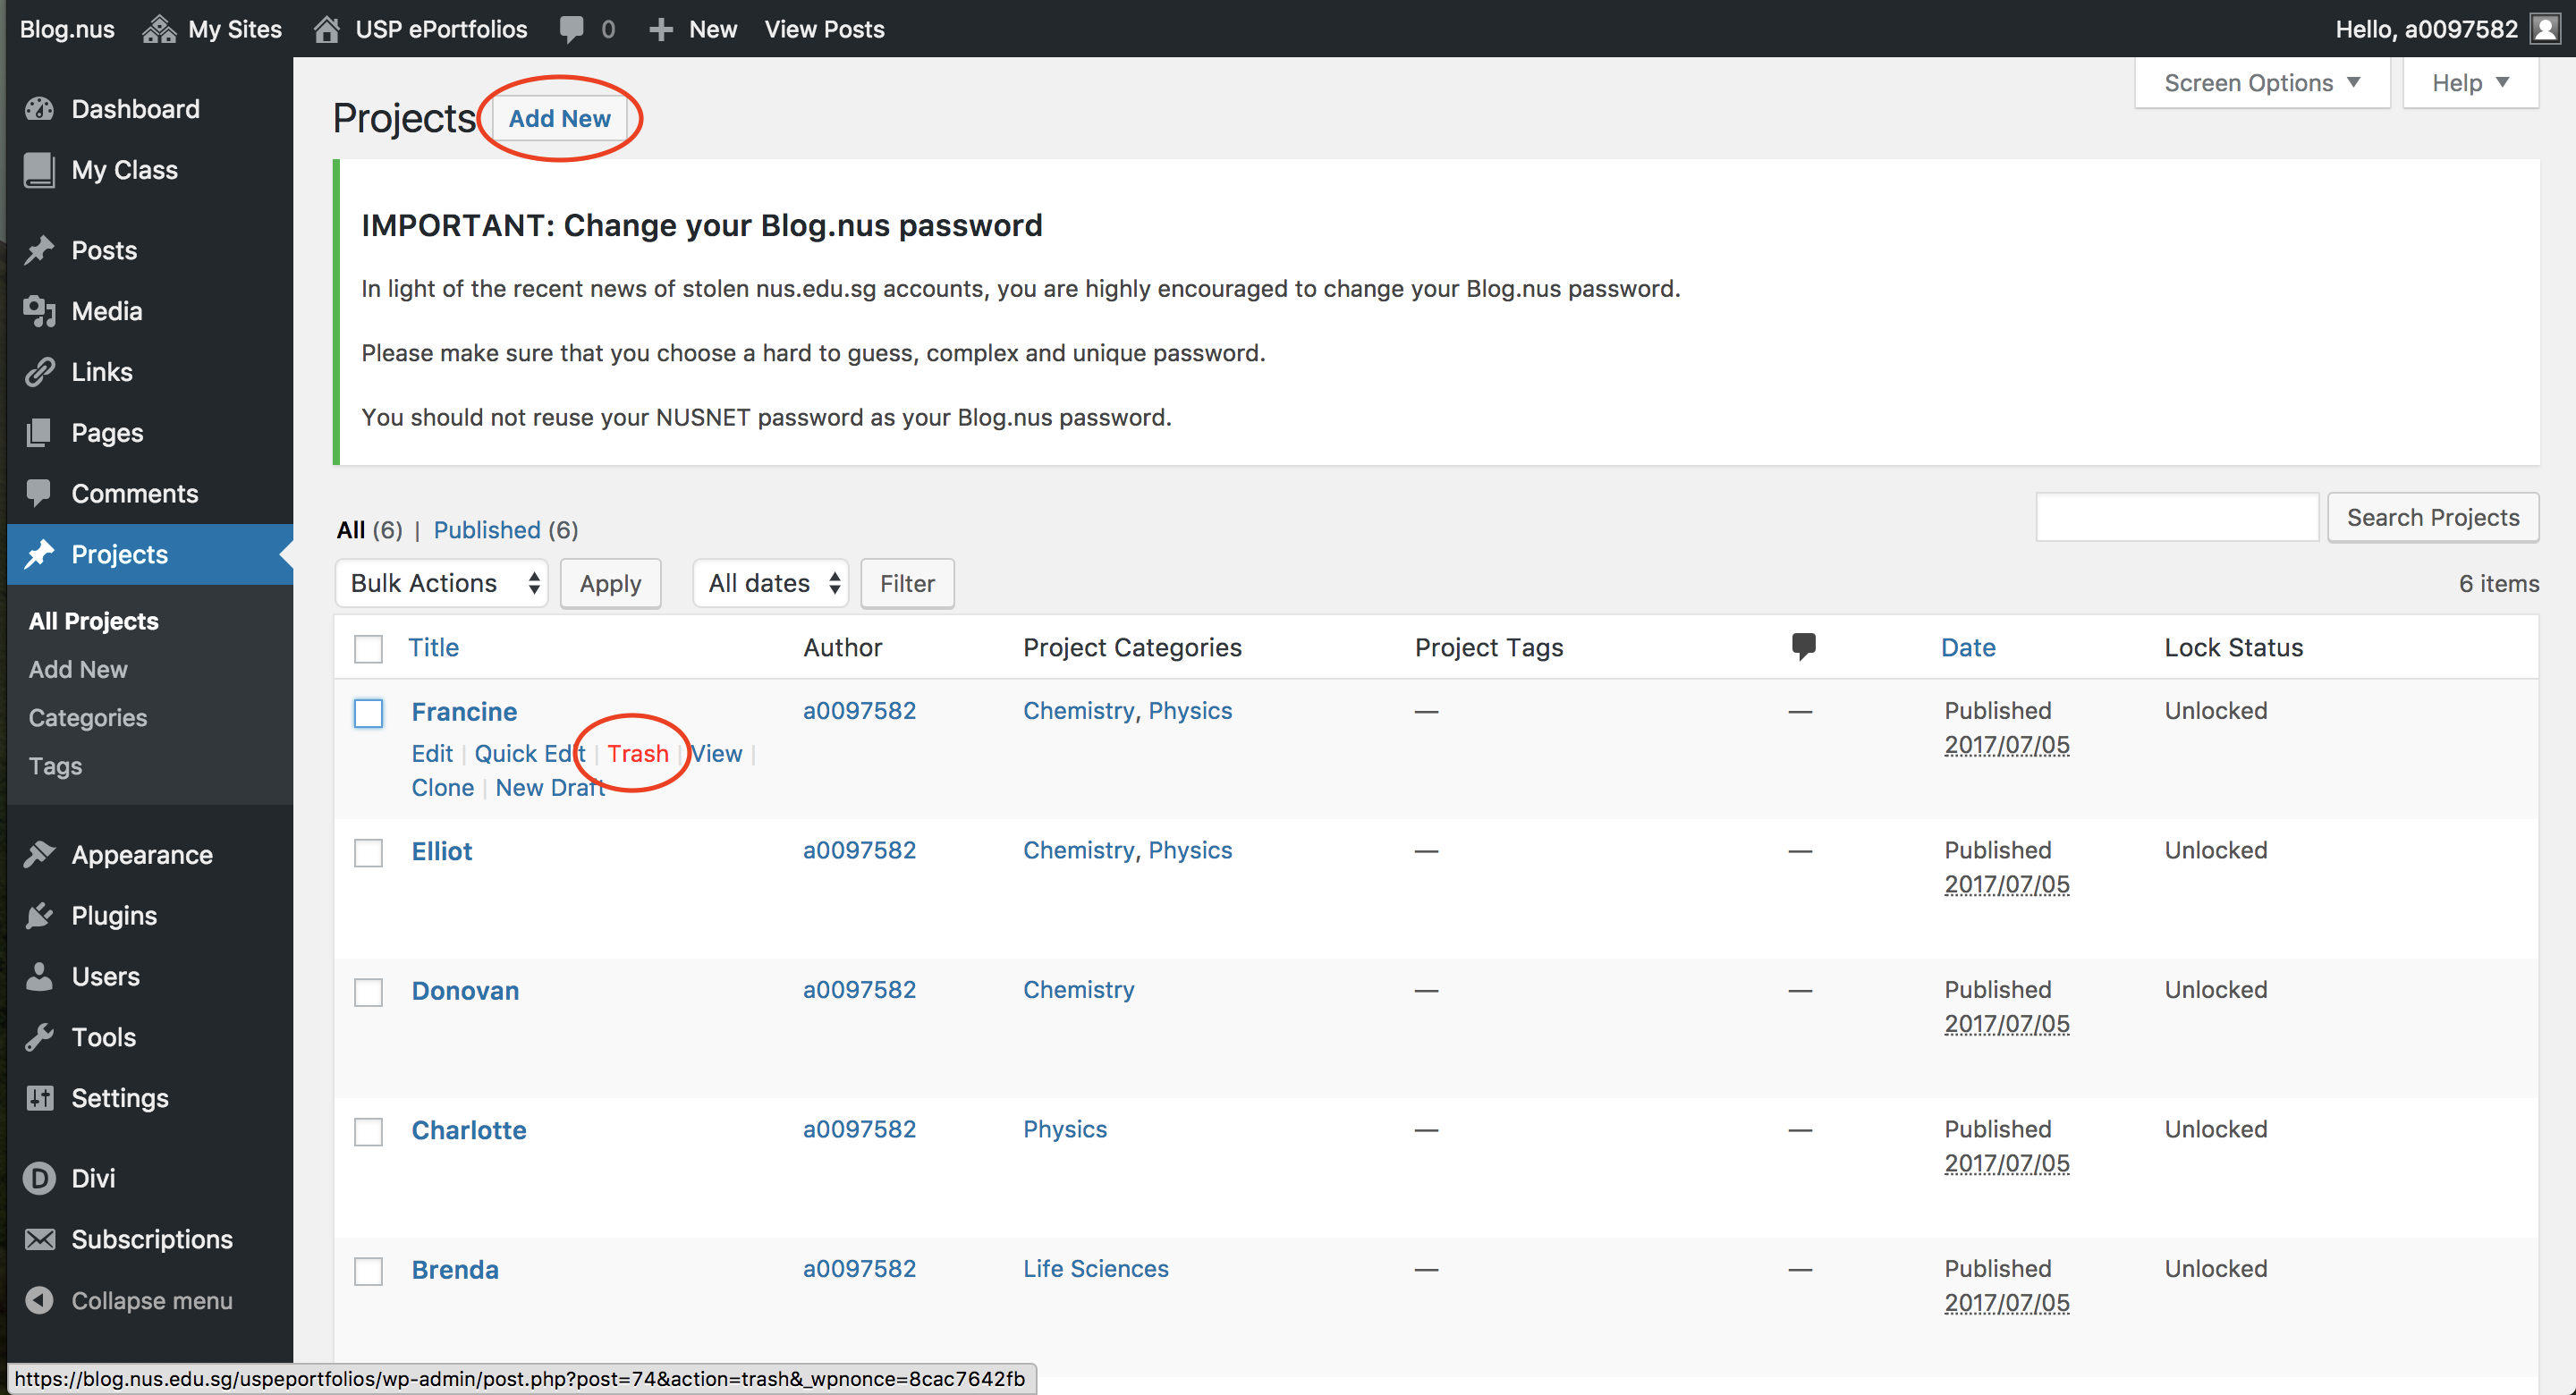
Step 2a. To remove a student from the showcase, hover over their name, and a Trash button should appear. Clicking it would delete the student from the showcase.
Step 2b. To add a new student to the showcase, click Add New from the top left-hand corner of the page.

Step 3. Fill in the student’s name in the title bar highlighted. Then, click on Use The Divi Builder Button.
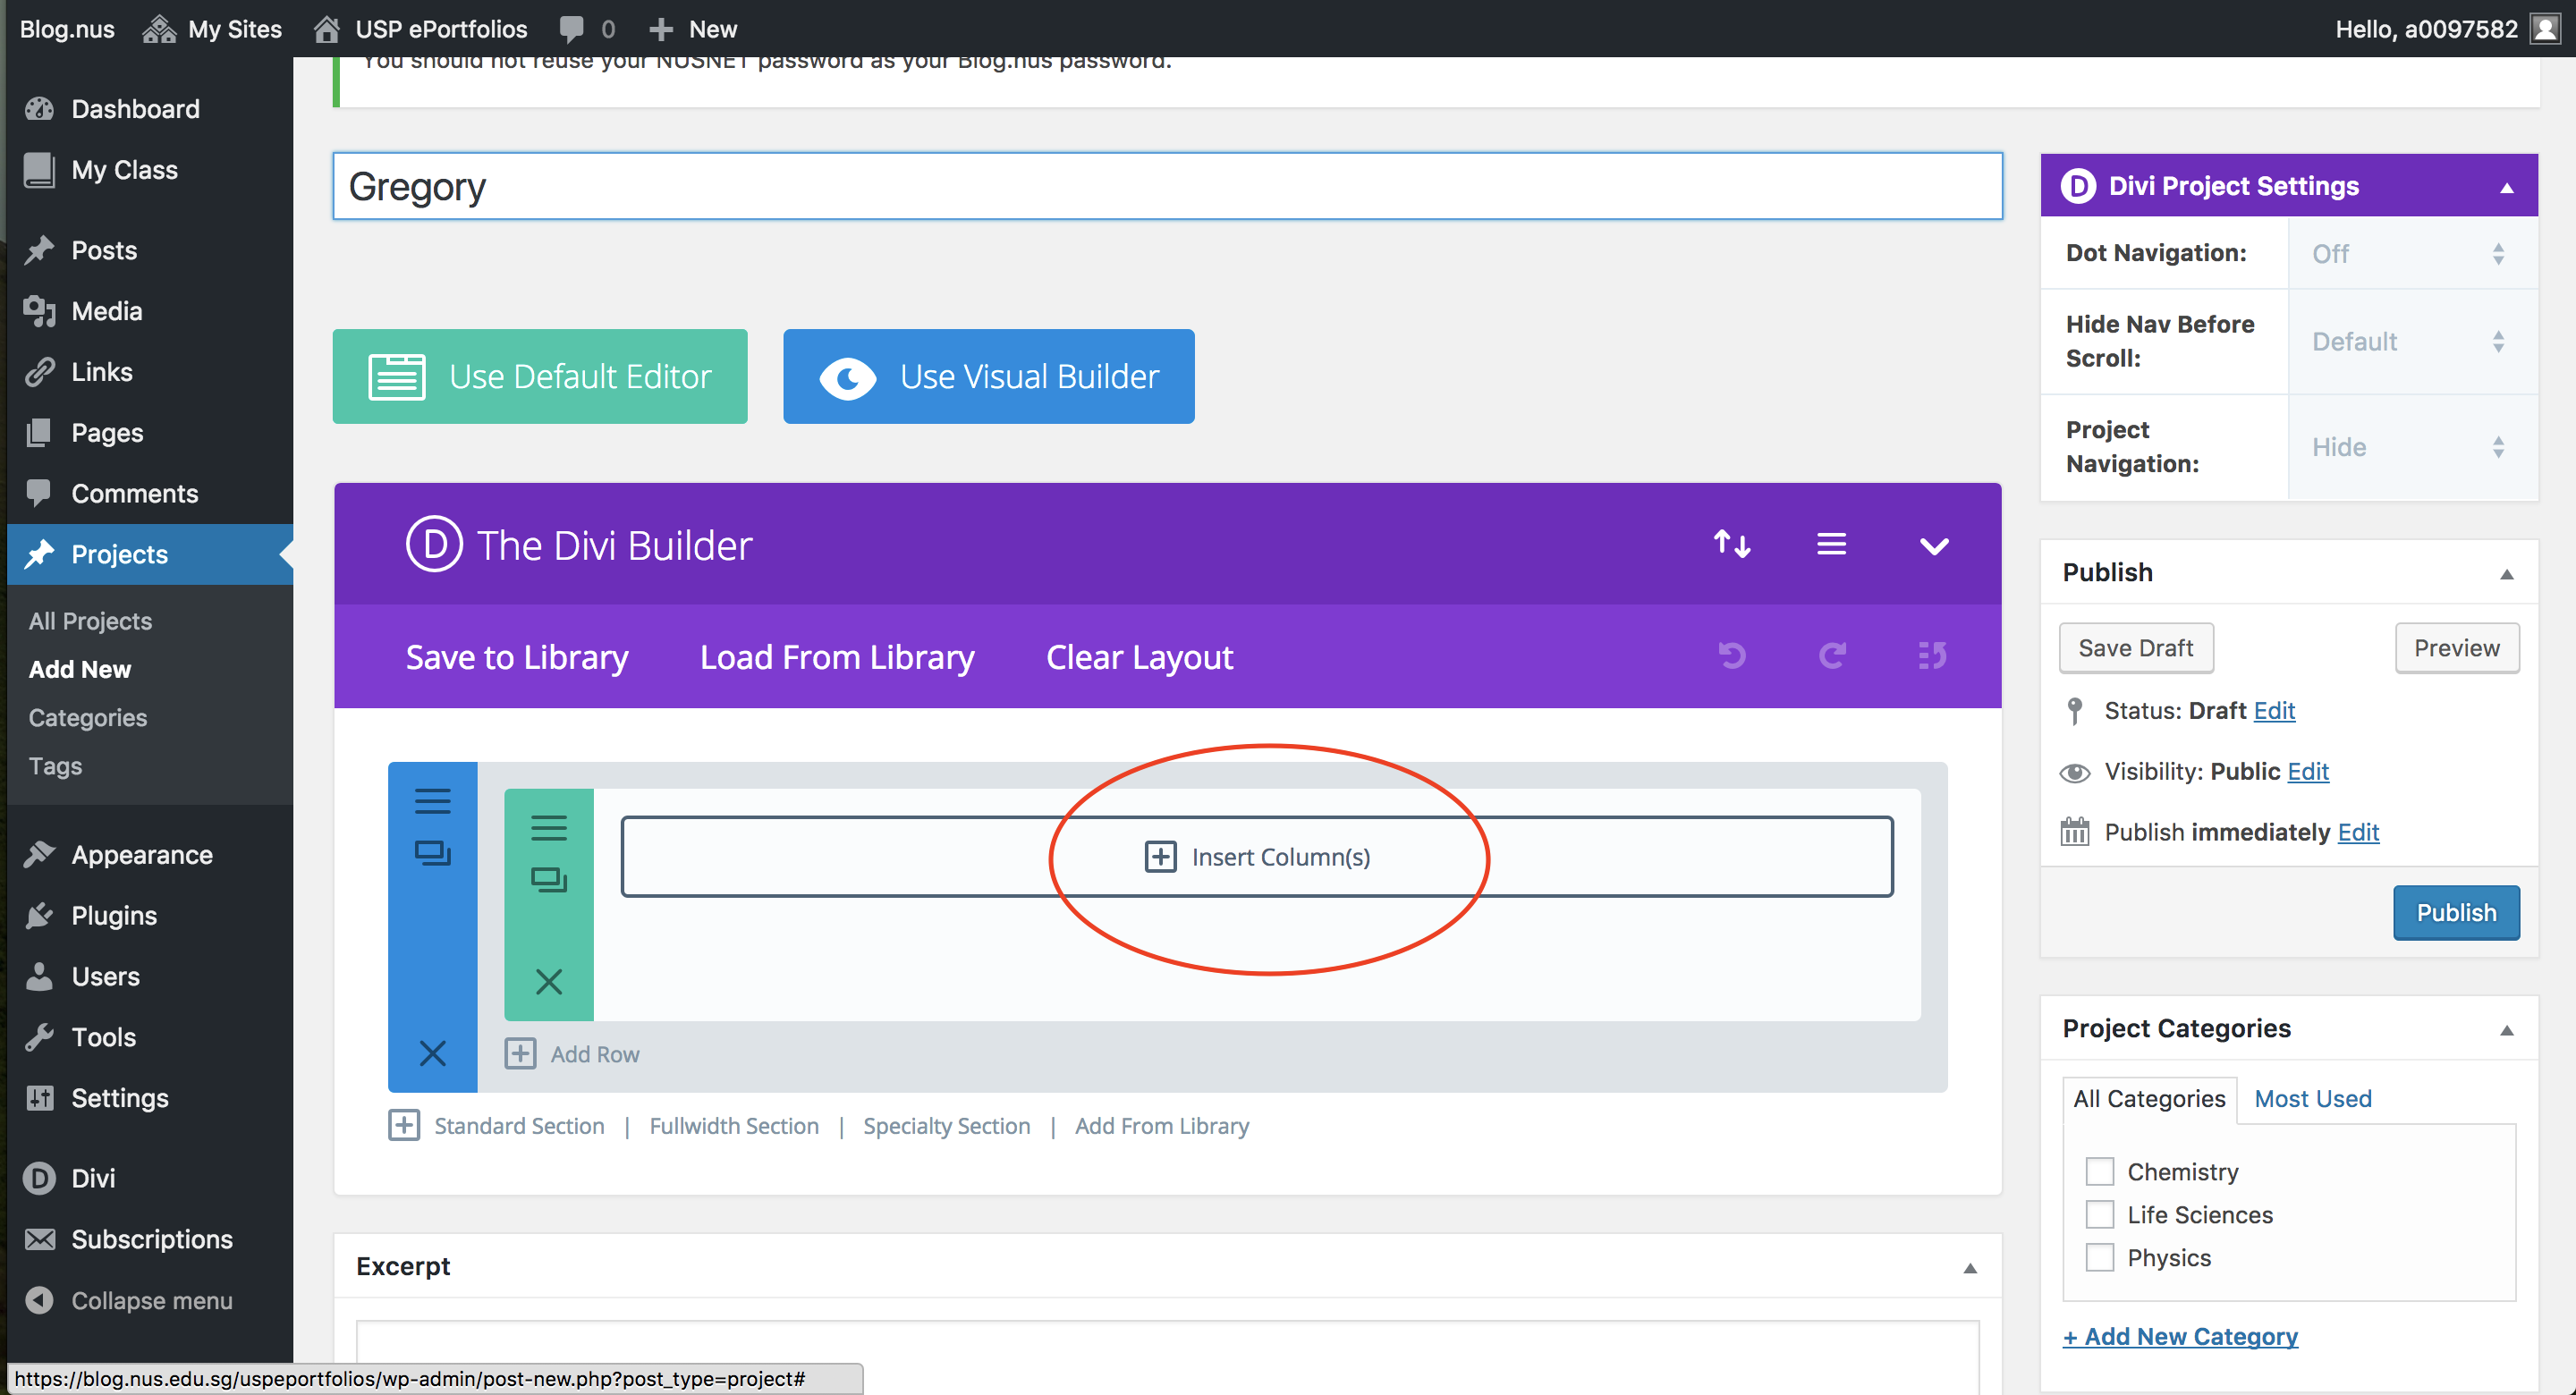
Step 4. Click on the Insert Column.
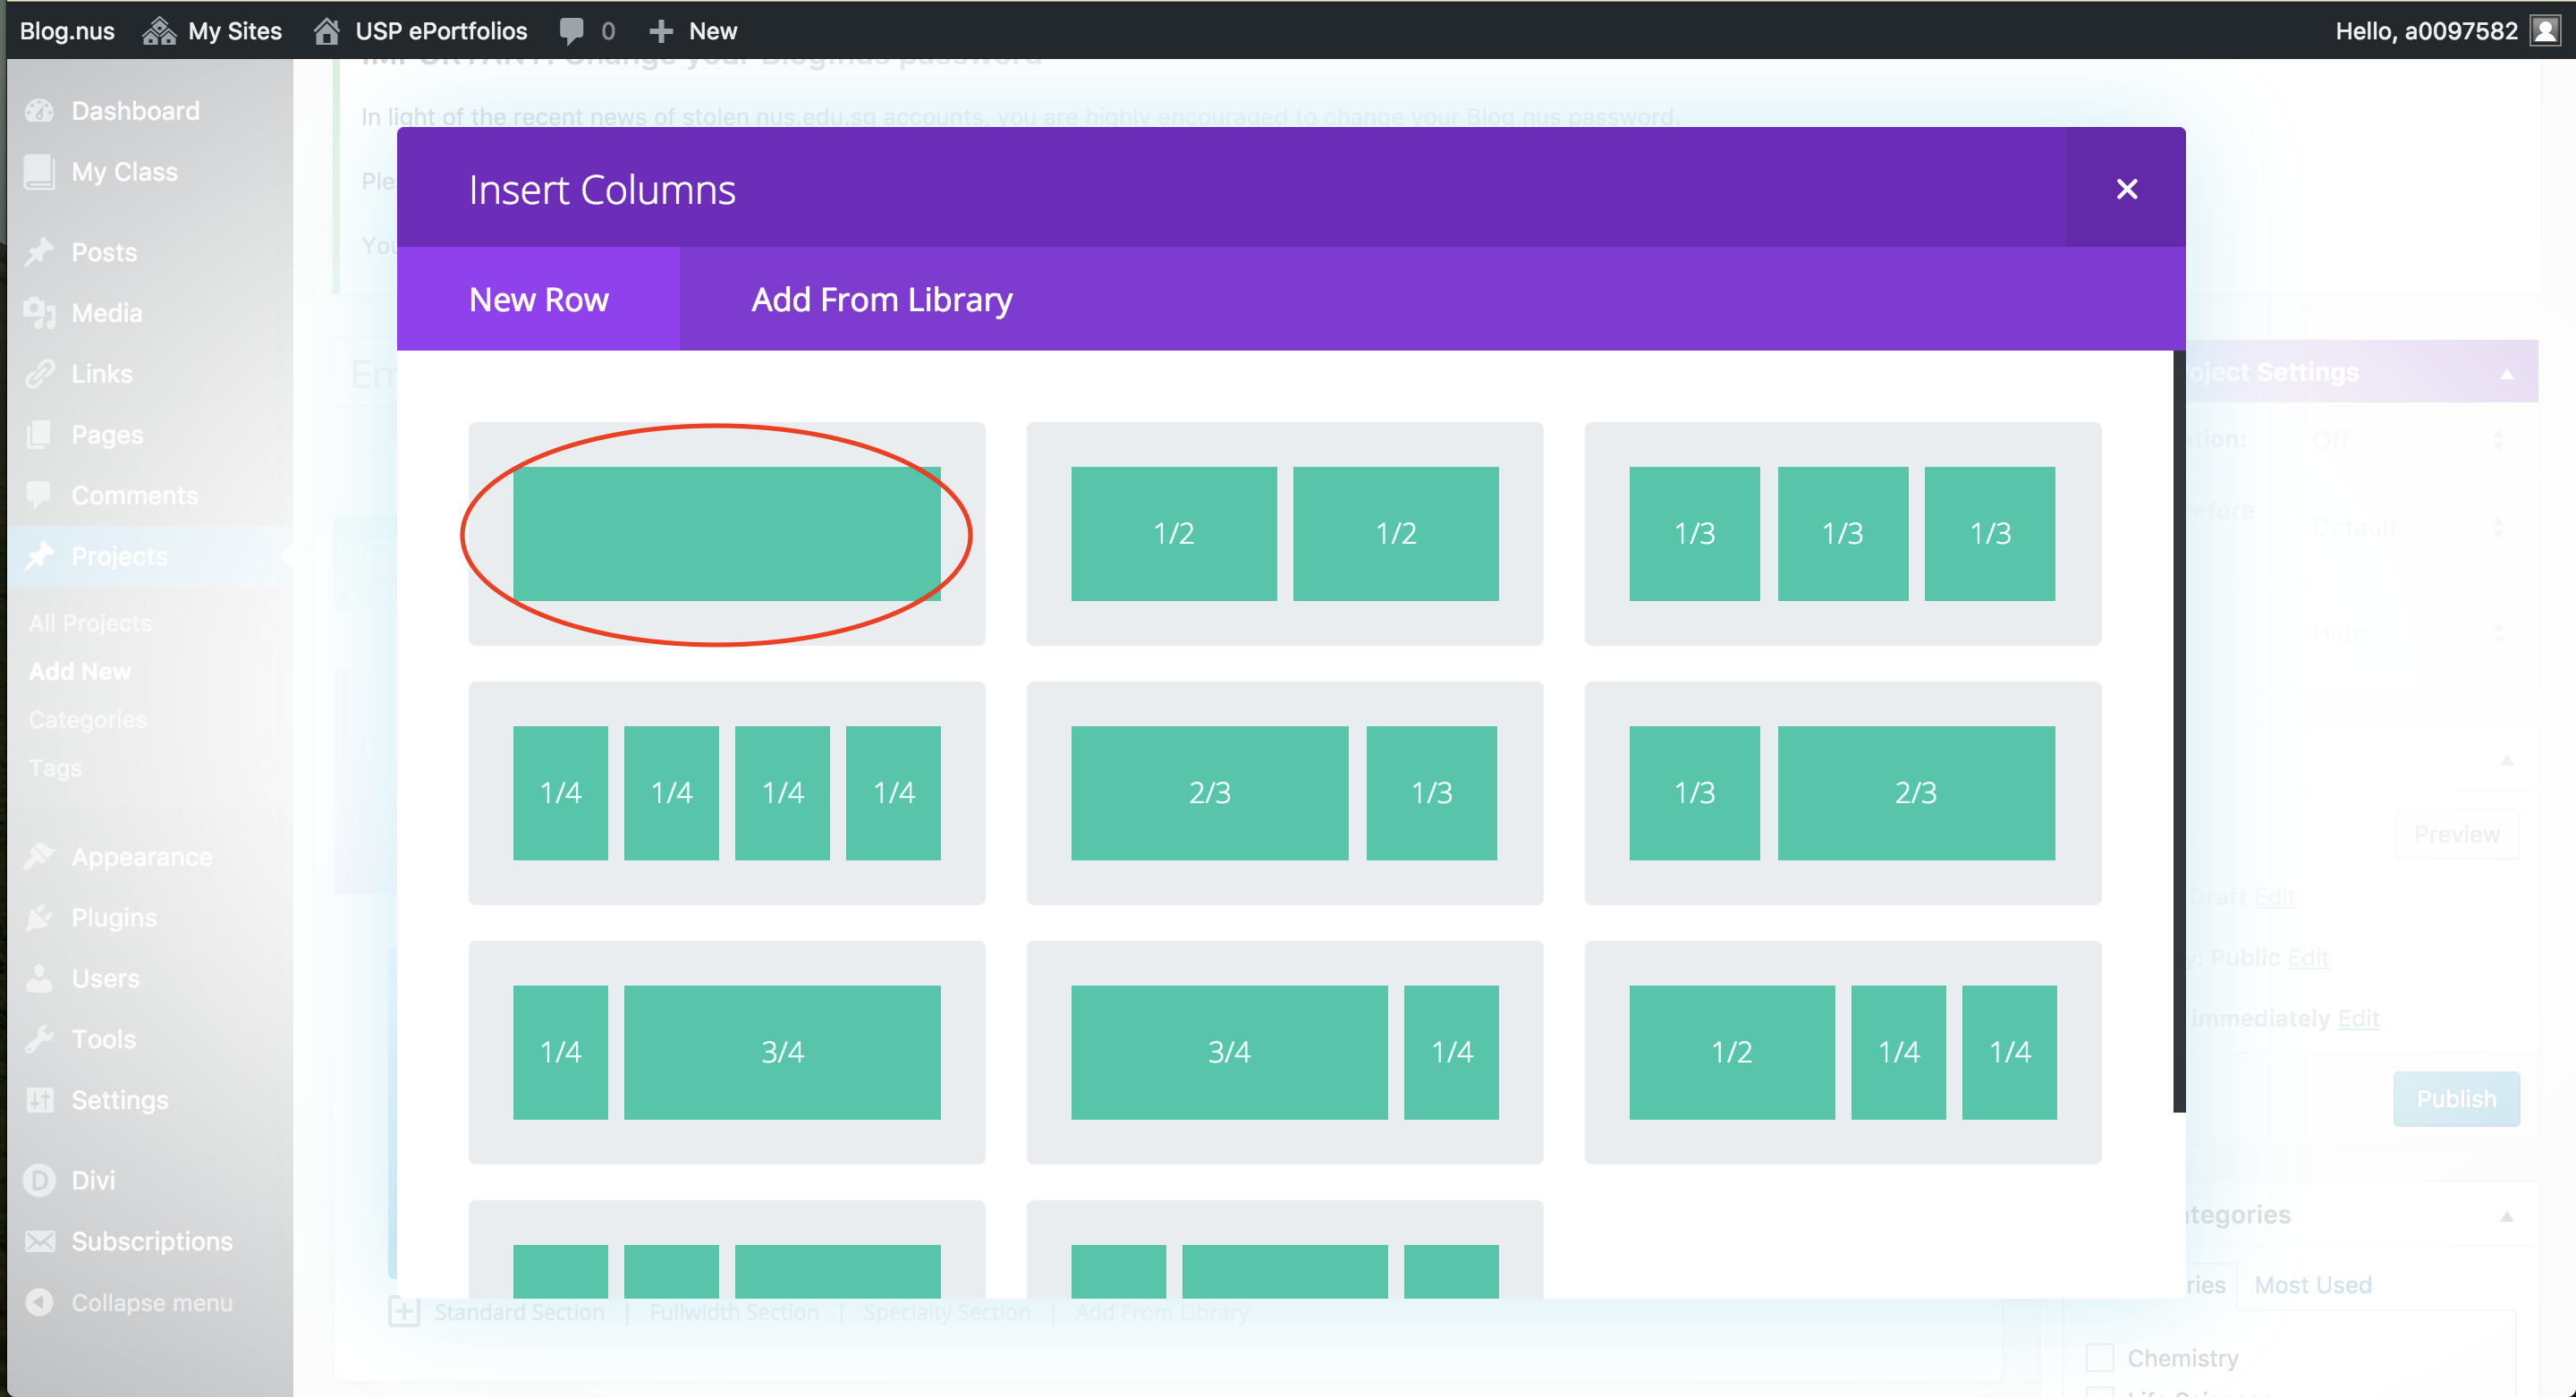
Step 5. Click on the Single Column option highlighted.

Step 6. Click on Insert Module.

Step 7. Click on Add From Library.
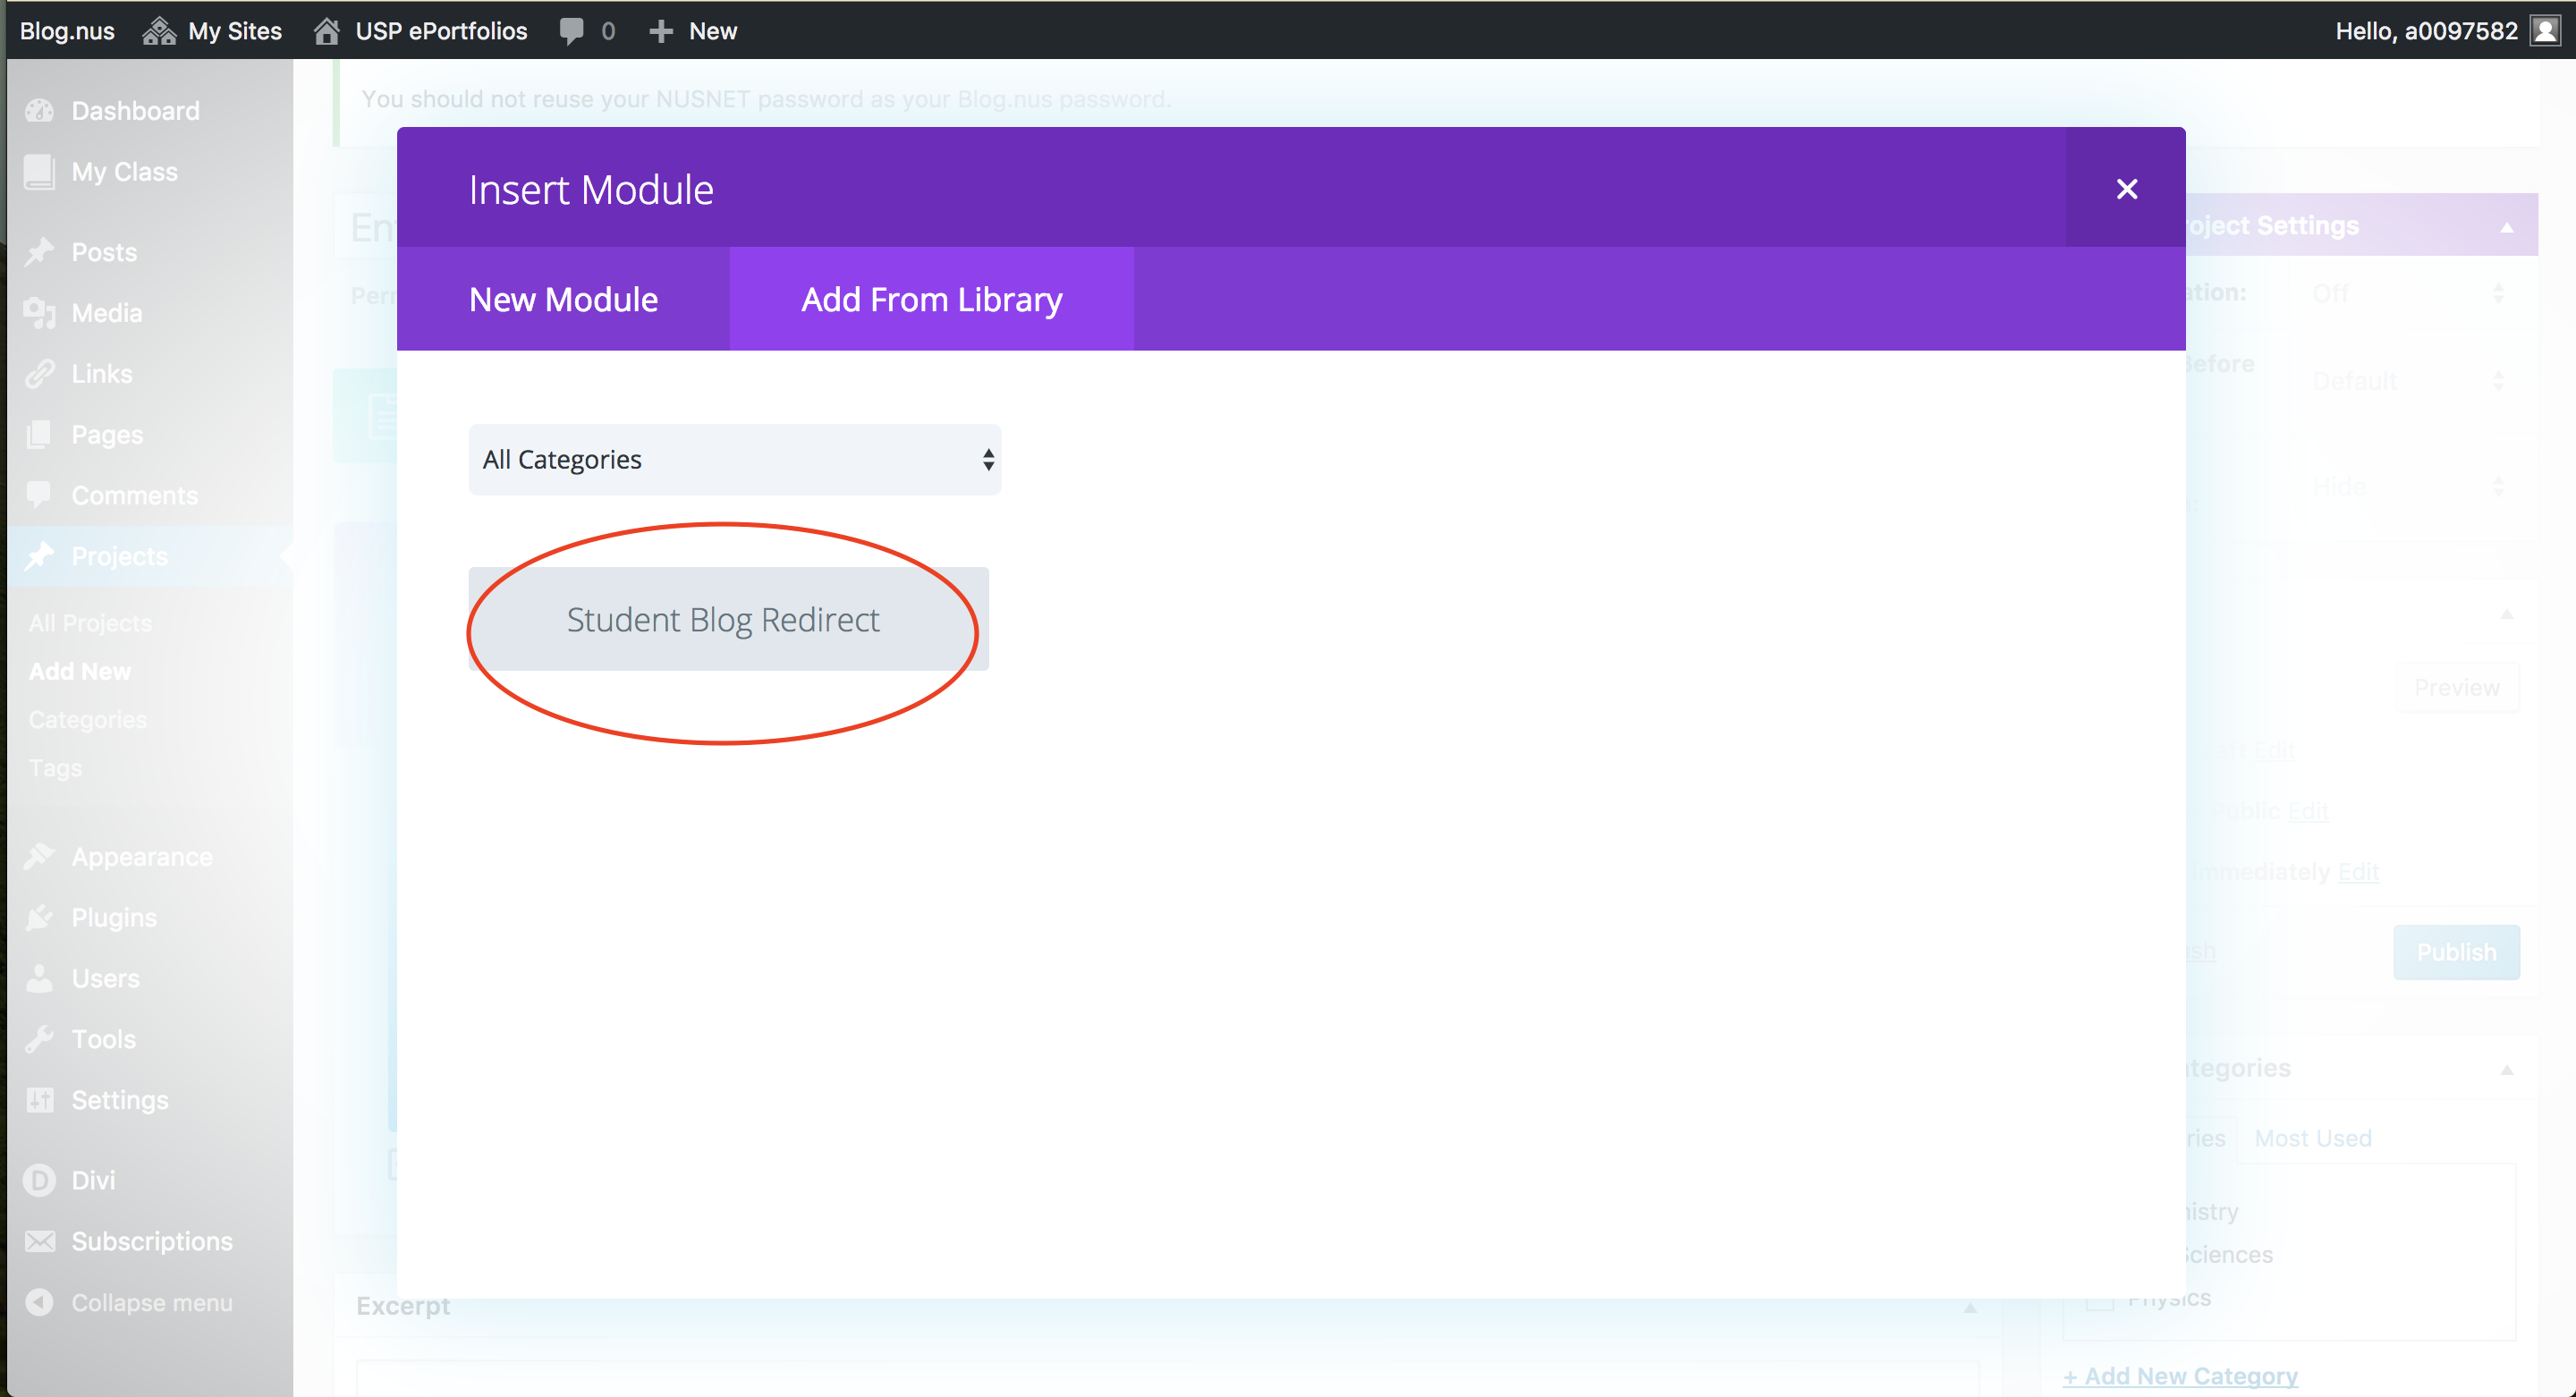
Step 8. Click on Student Blog Redirect.
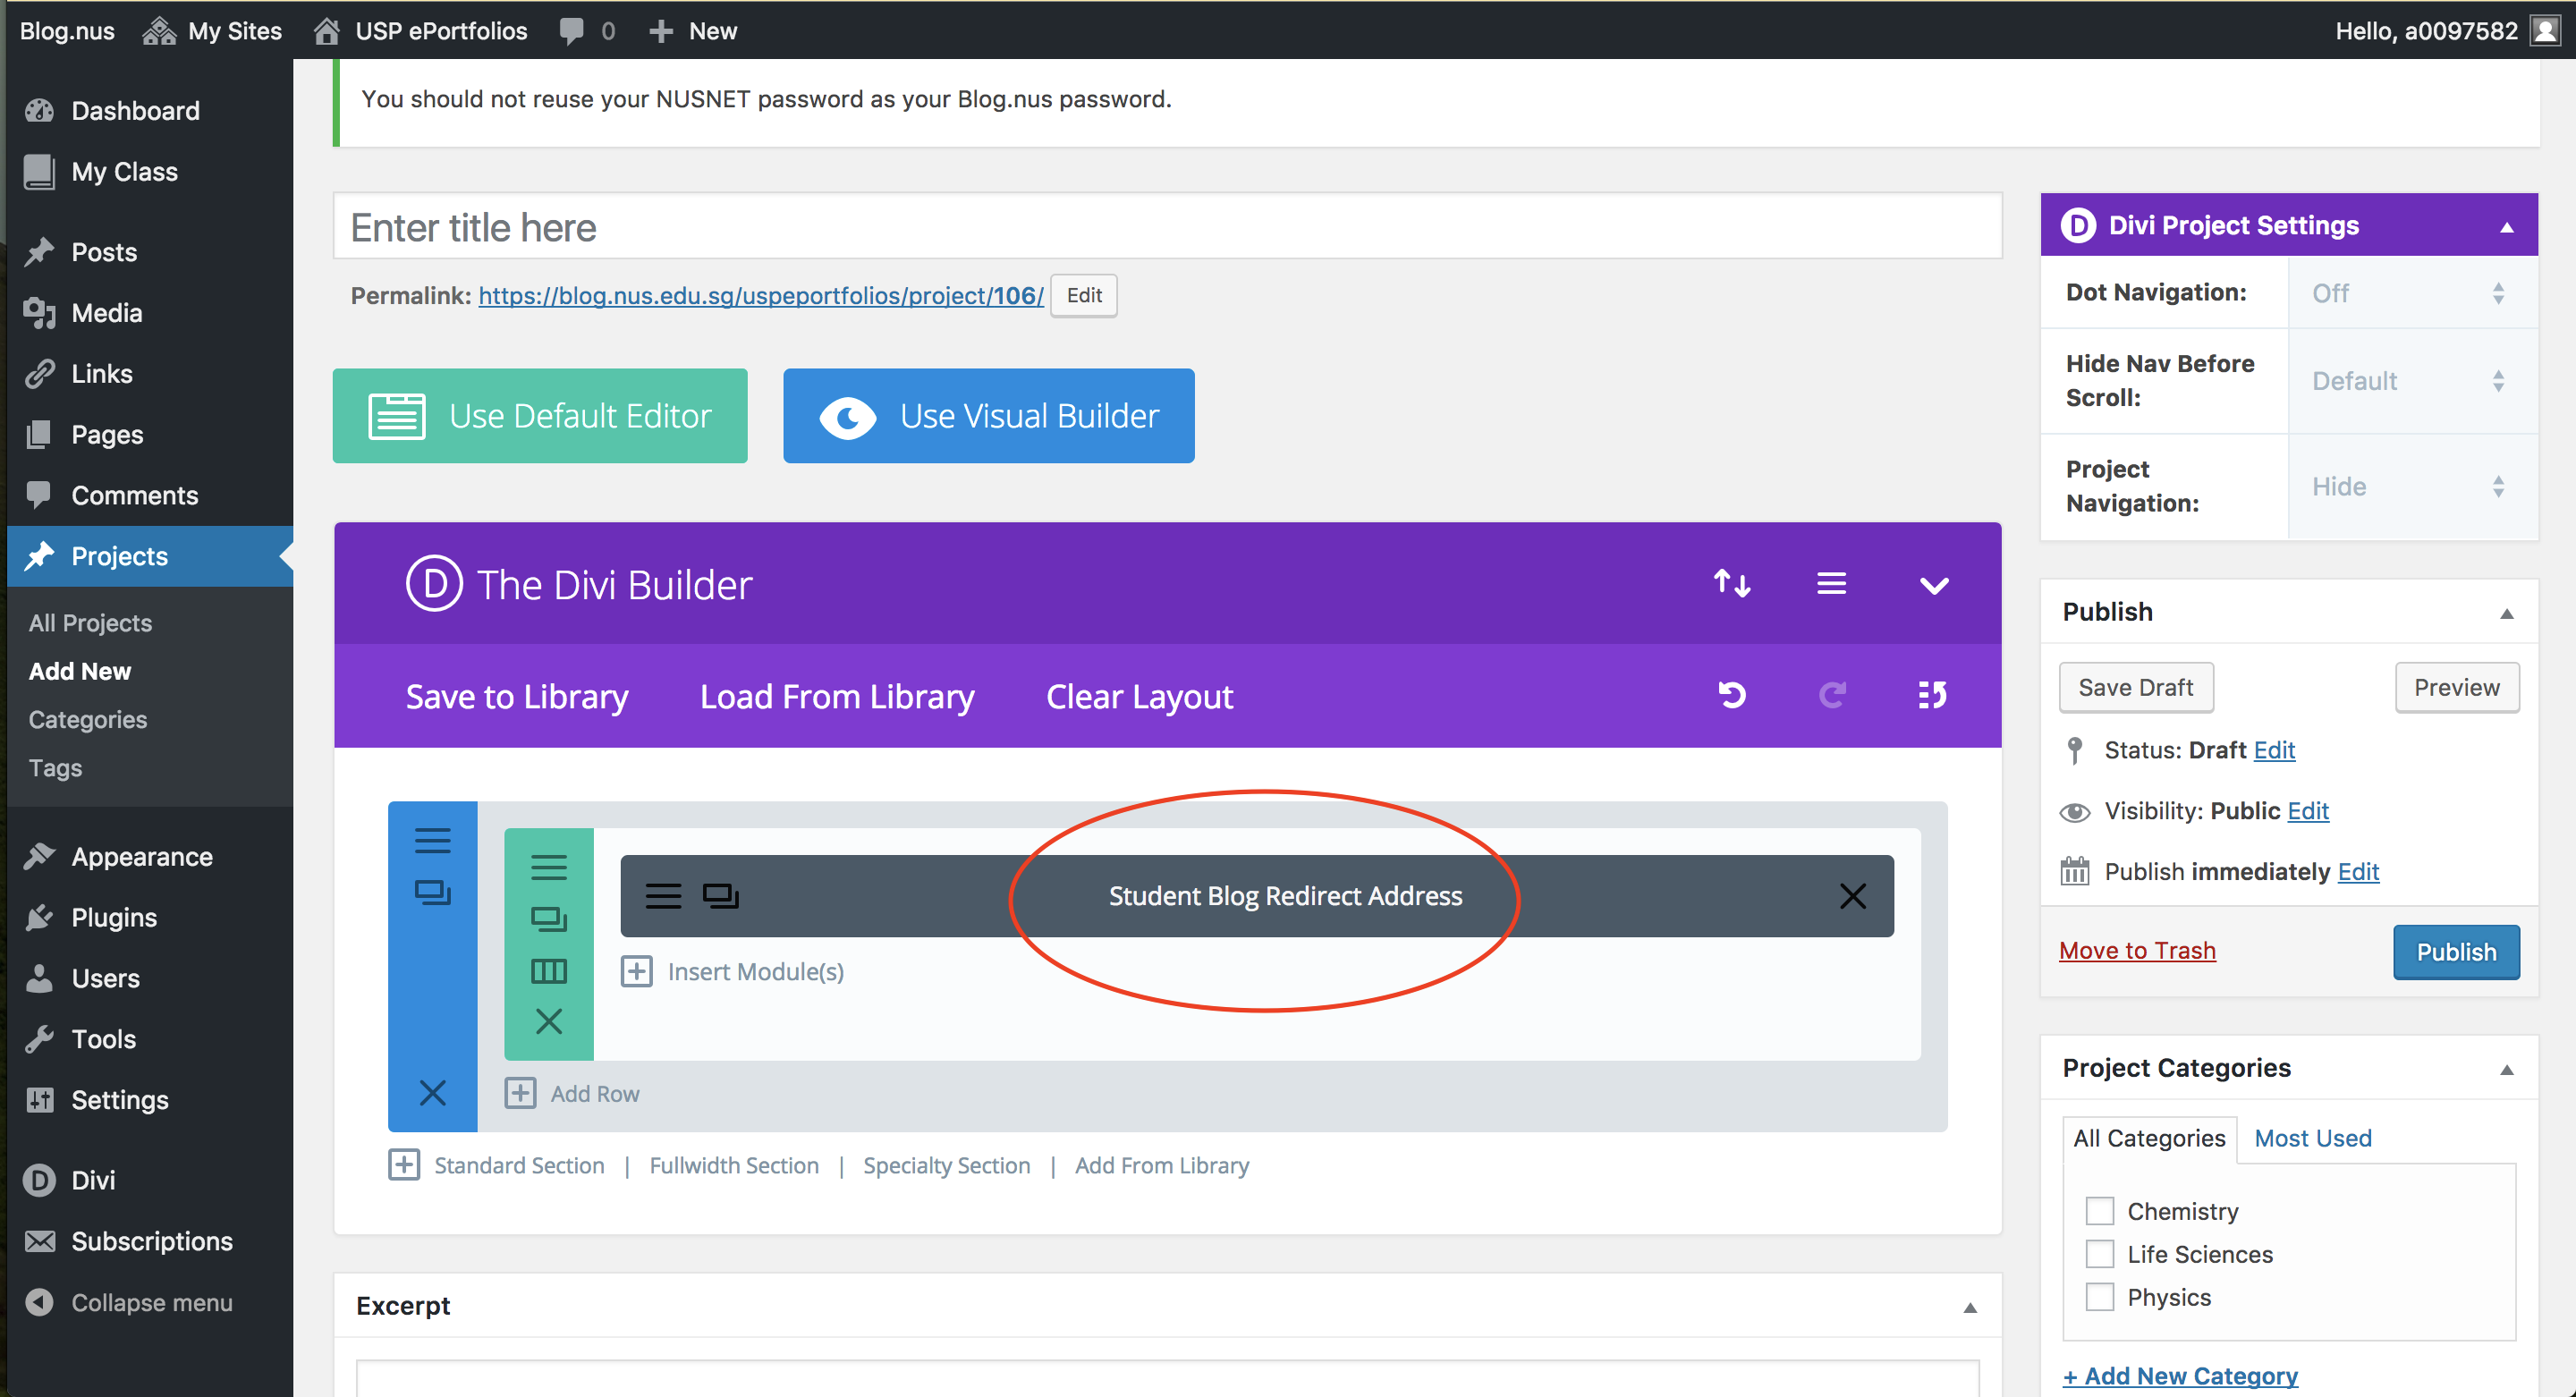
Step 9. The Student Blog Redirect module should appear. Double-click on it.
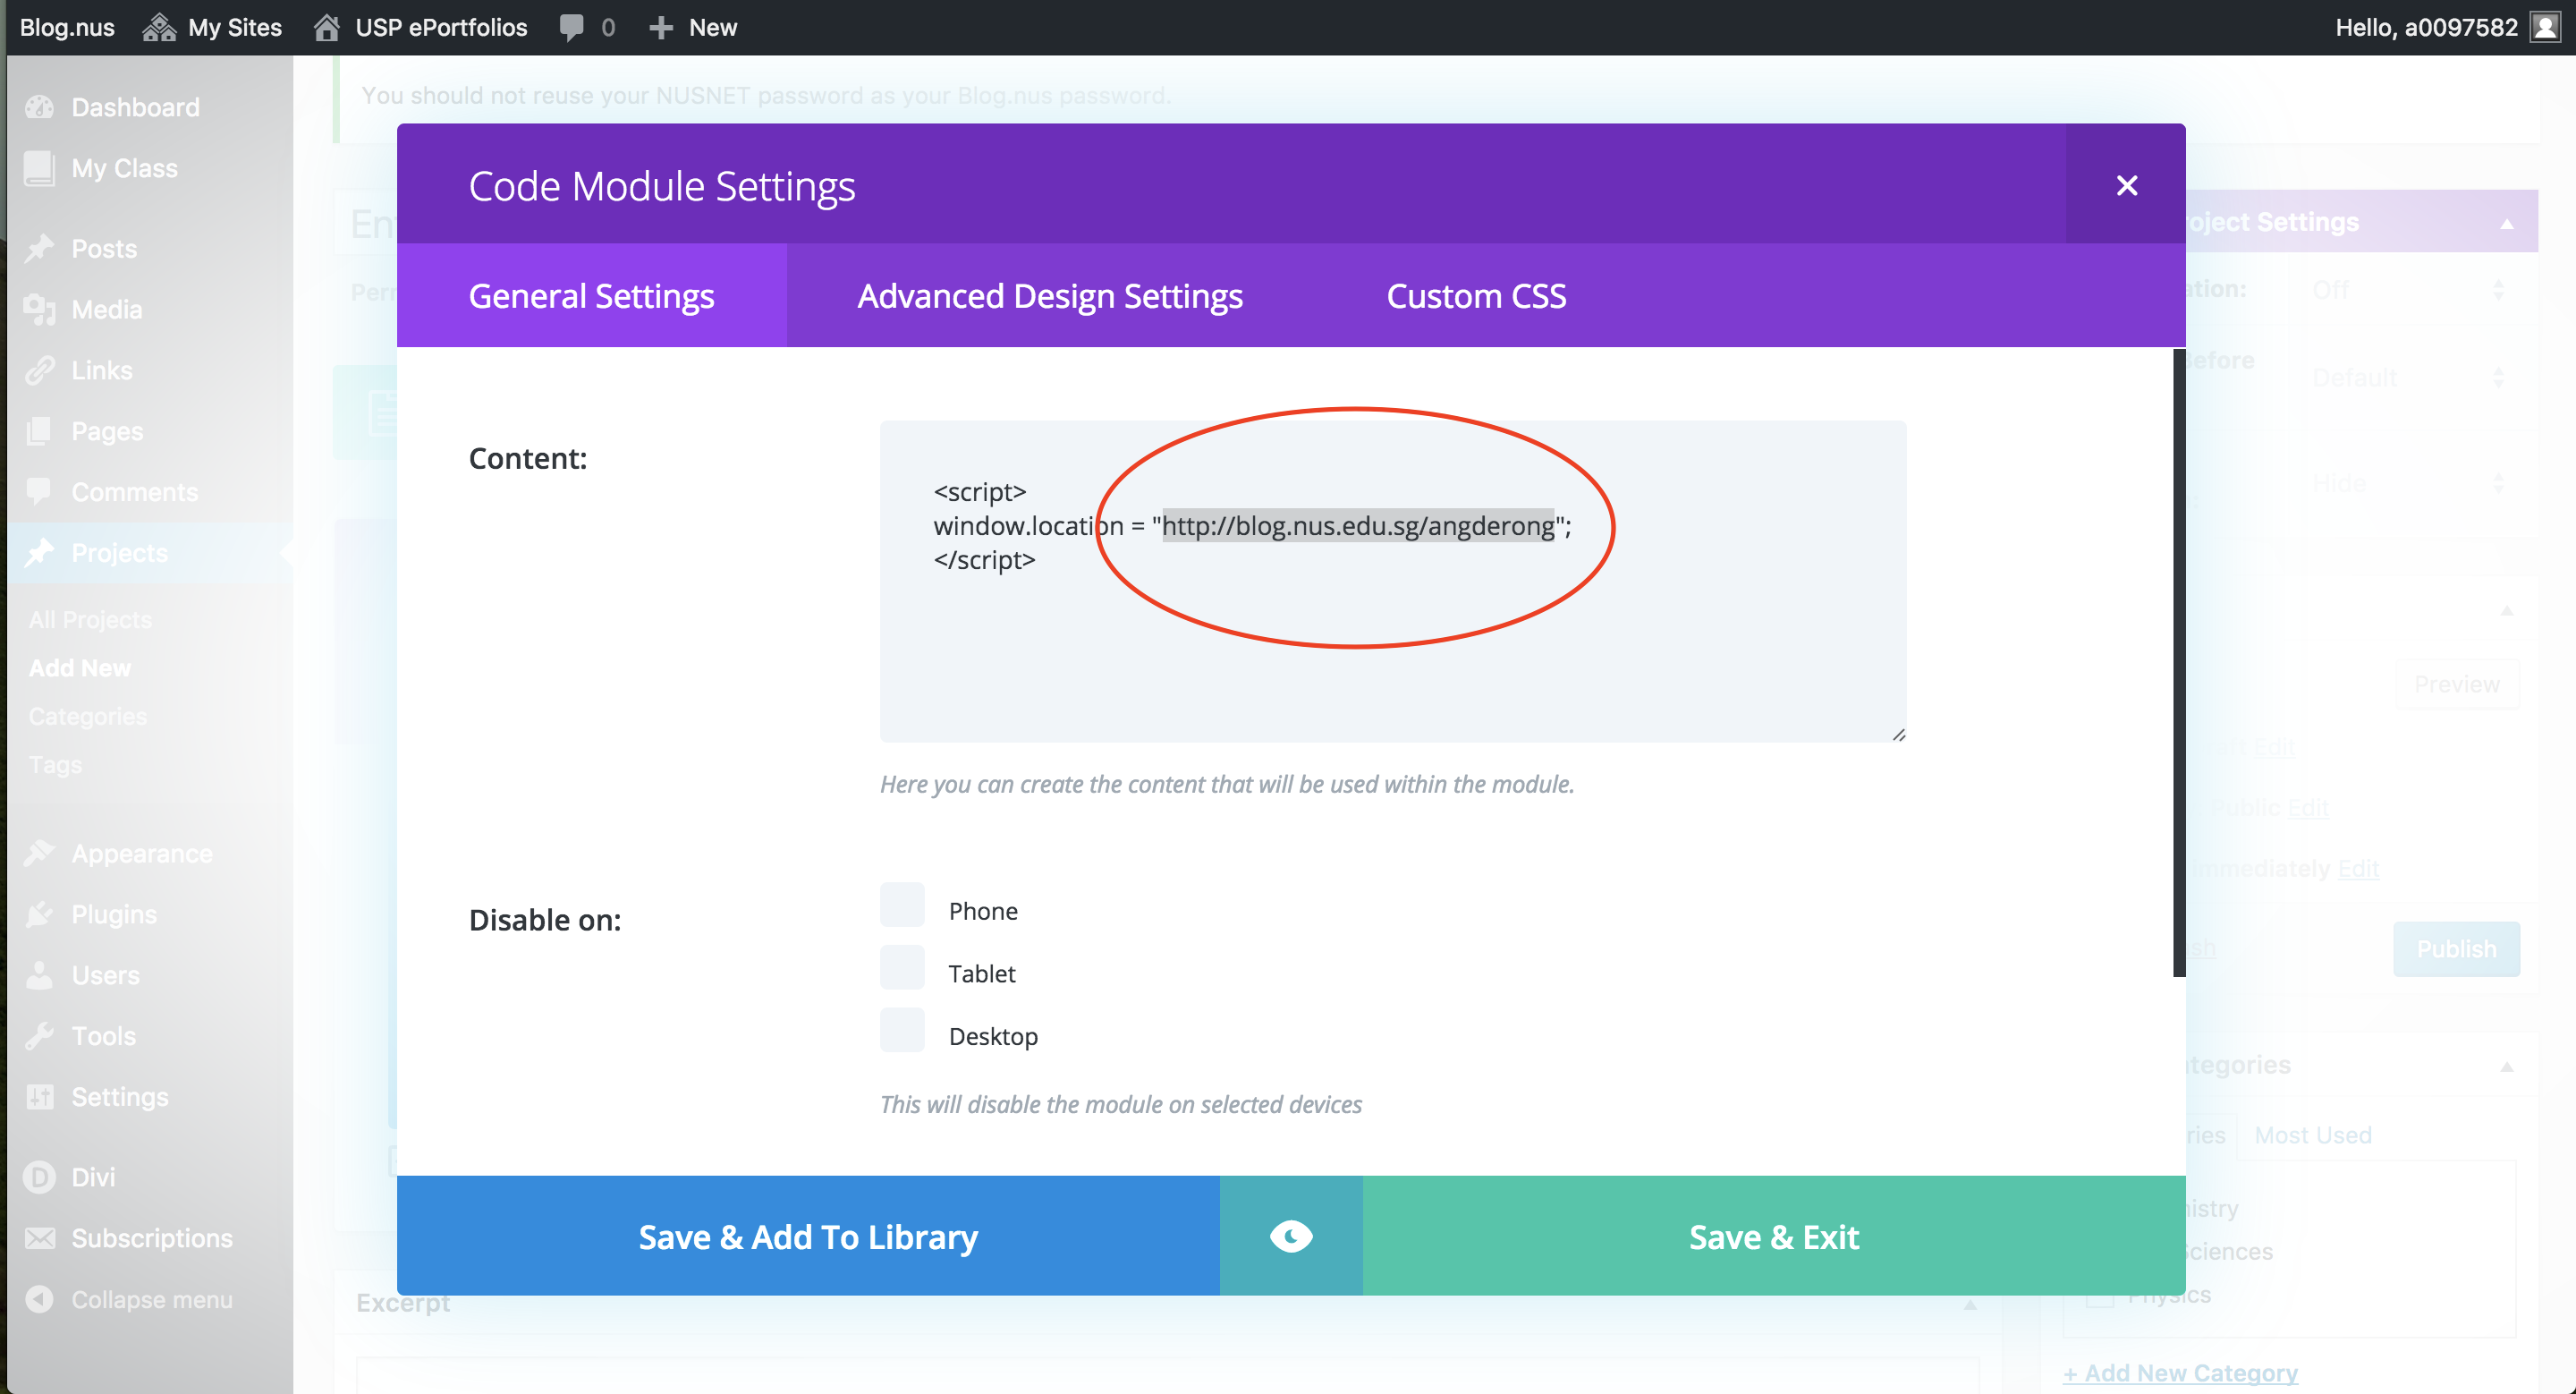
Step 10. Change the Url Address of the student’s blog to the appropriate one as highlighted. Ensure that the Url Address is encapsulated by a set of double-quotes. Then click Save & Exit.
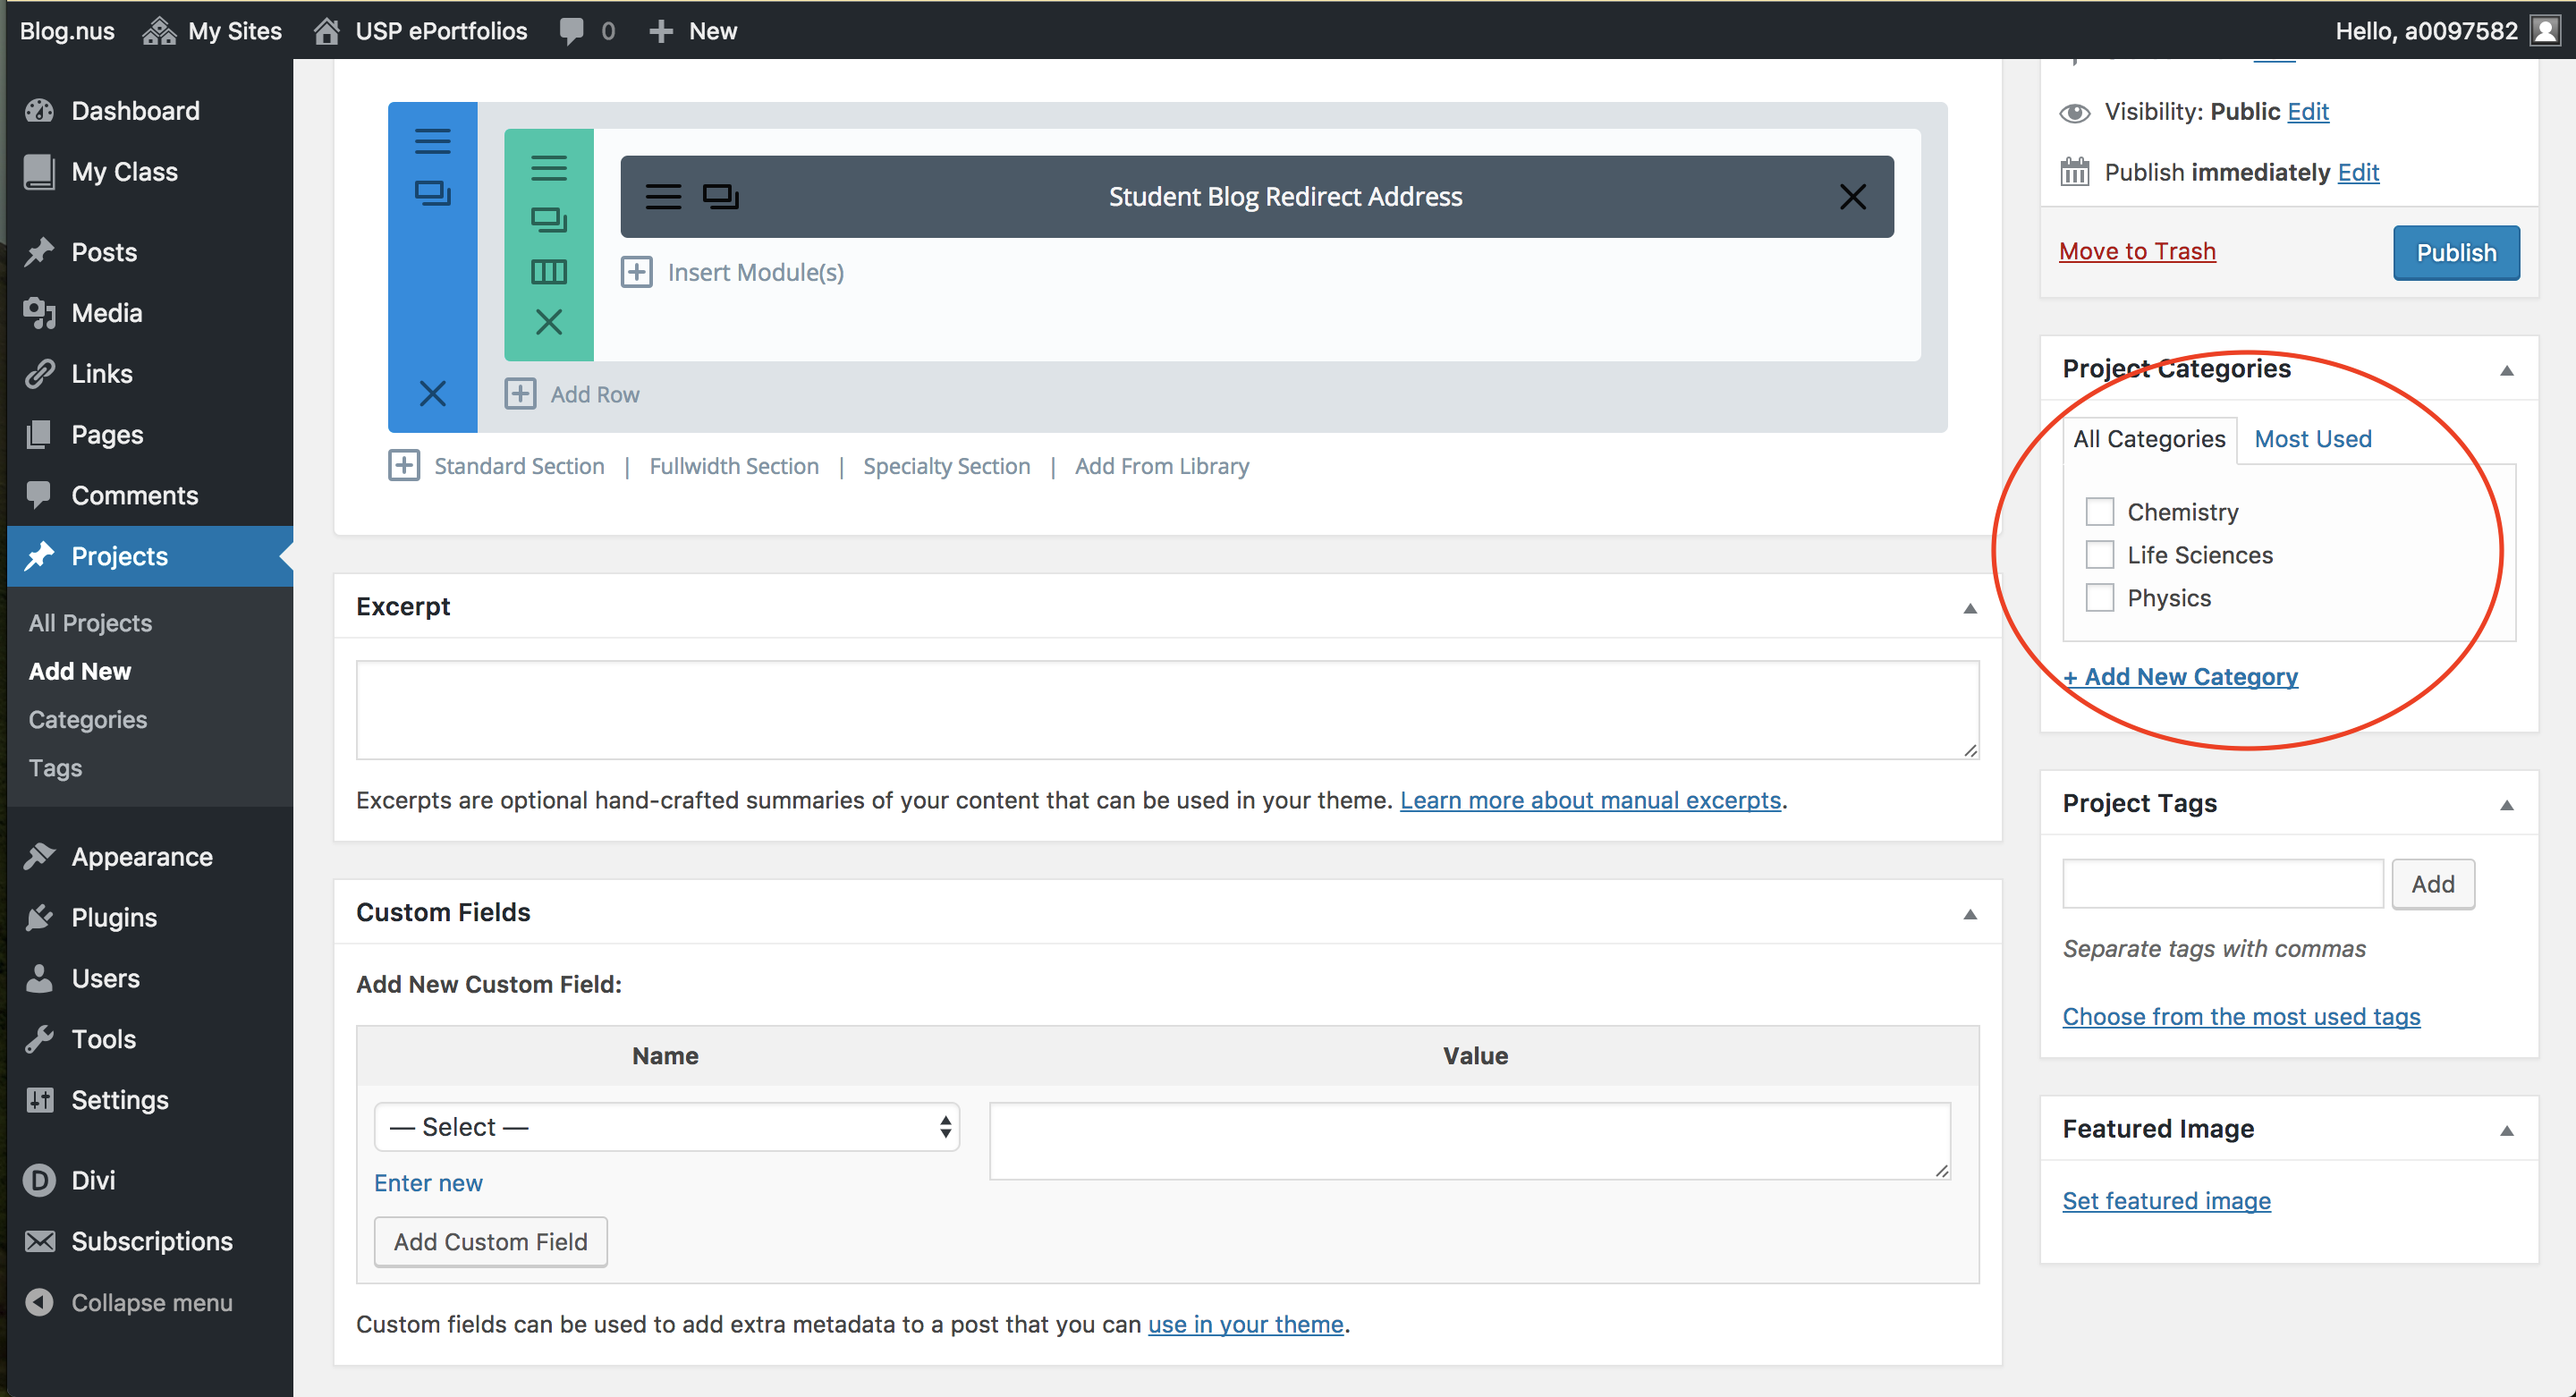
Step 11. Select the student’s major in the section titled Project Categories. If the student’s major is not listed, you can click on Add New Category, then fill in the major.
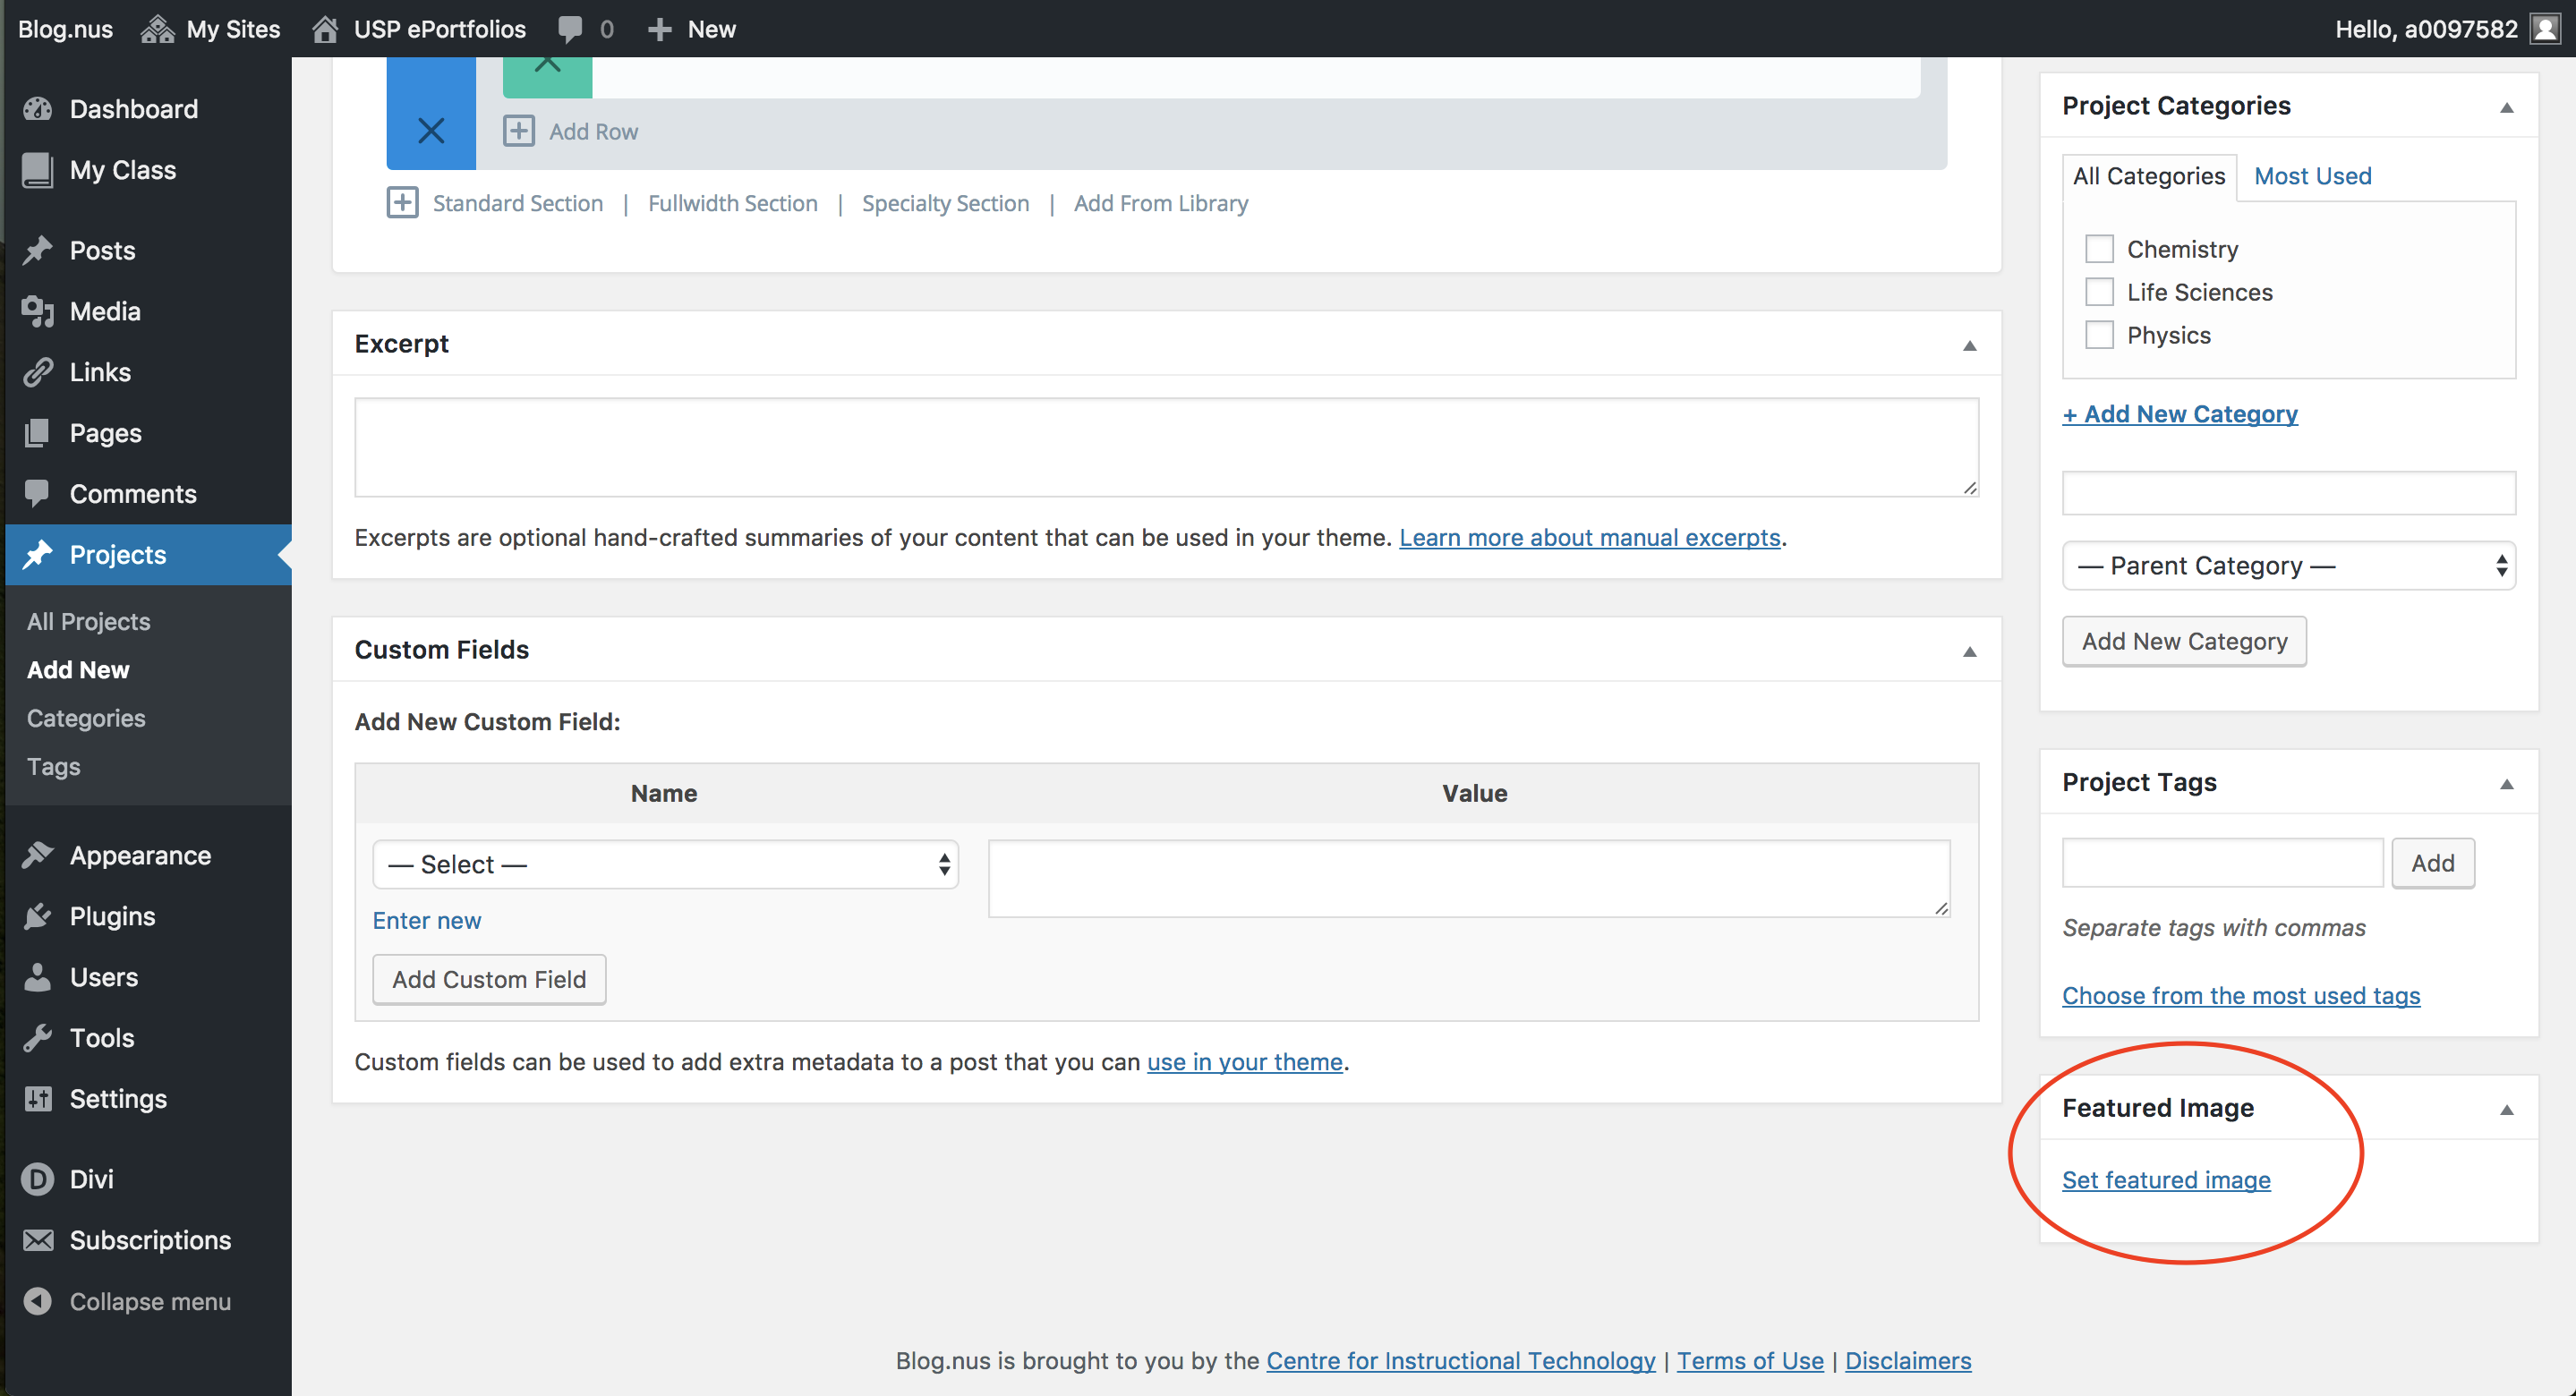
Step 12. Add a related image that would display in the Filterable Portfolio. It is preferable for this image to be landscape with approximately 4 by 3 ratio.
Step 13. Finally, click Publish to save all the changes.