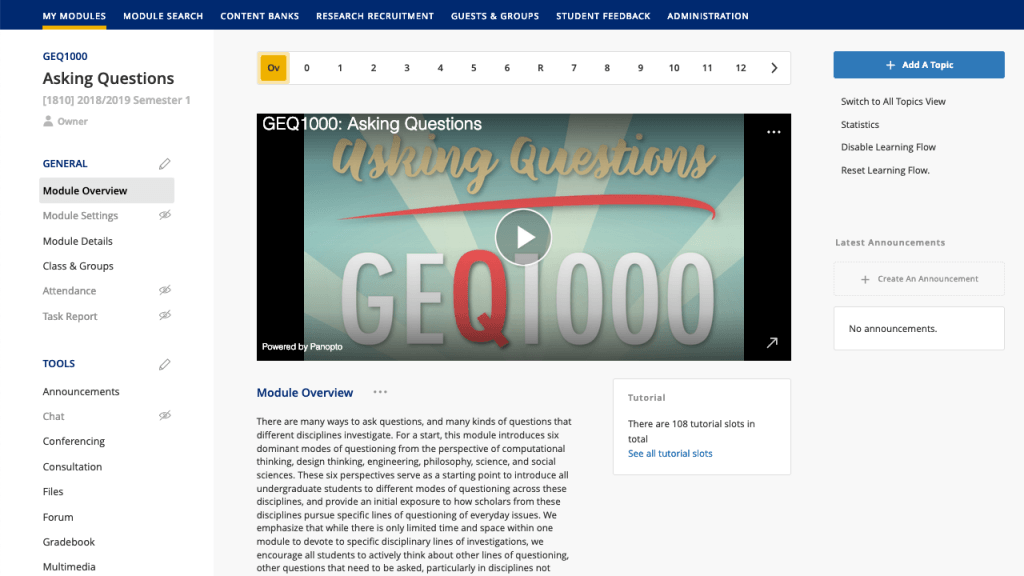
Nine major changes in LumiNUS

Reminder: Consultations and workshops

Walk-in consultations have begun. Please visit the walk-in consultations page for details.

Our LumiNUS First Steps workshops have also kicked off. You can view the schedule and sign up for the workshops.

What’s different and new in LumiNUS

The LumiNUS information site has a list of what’s new in LumiNUS. In this issue, we want to briefly highlight nine major changes.

1. Single view

There is now one view instead of an edit mode and student view. We have made the interface for staff and students as similar as possible. Items indicated with the not visible icon are not accessible or visible to students. You can mouseover the icon to see the reason why the item is not accessible or visible to students.
Not visible icon

2. No Multimedia and Guest Banks

We have removed the Multimedia Bank and Guest Bank. We removed the Guest Bank as there is a new way of adding guests (refer to non-NUS Guests below). Instead of the Multimedia Bank, you can search for every video you have ever uploaded to LumiNUS. So, be accurate and thorough when naming your video files.

3. New semester, new Module

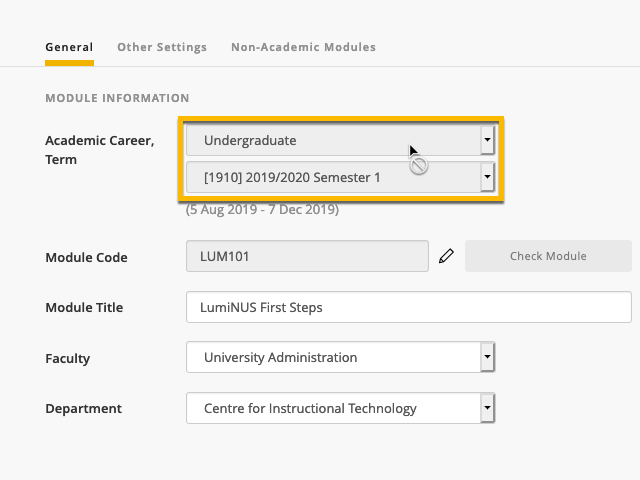
Academic Career, Term - cannot be modified
You may have discovered that you cannot change a Module’s Academic Career and Term after you have created a new Module. This seems perplexing, but we have done this with the future in mind – analytics.

This implies that each module will have a distinct Module in LumiNUS for each semester. It does not mean you have to start from scratch every semester. You can duplicate existing modules via Create Module.

4. Evaluation (Jan 2020)

Project tool is no more. We are working on a new tool, Evaluation, to replace it, but this will only be ready in August 2020 at earliest. If you need peer evaluation, you can try TEAMMATES. This is a free app built by Assoc Prof Damith Rajapakse and his team at NUS School of Computing.

5. Drag and drop

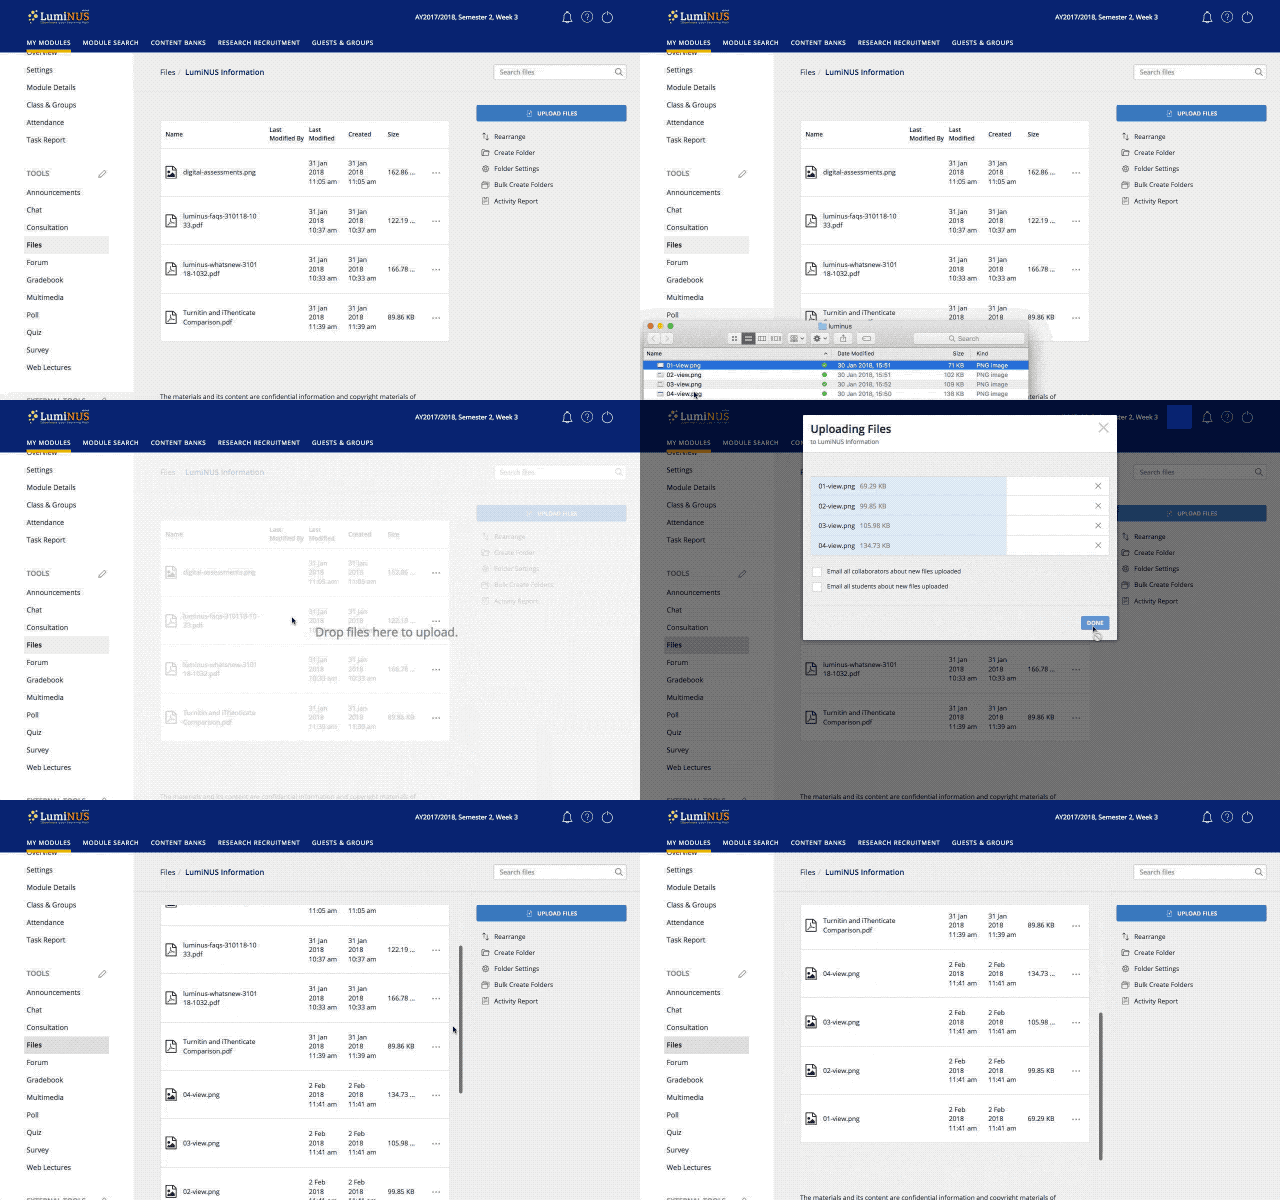
Drag and drop for bulk upload.

You can rearrange any item that can be rearranged using drag and drop. Example are Module Description sections, Files, Forums and Quiz questions. You can also drag and drop in Files to upload.

6. File submission deadline

Set deadline for submission
In Files submission folders, there is a new date: File submission deadline. This is an optional date that is off by default.

The File submission deadline offers two possibilities. You do not need to create a late submission folder for assignments, and your students can access your comments on their work.

Note: this feature applies to LumiNUS Files submission folders only. Turnitin submission folders features remain the same.

7. Groups

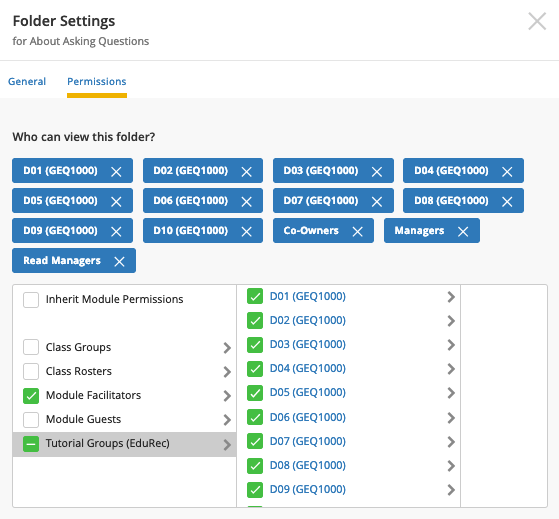
Groups are now more powerful. You can use Tutorial Groups for assigning permissions to tools. This frees up Class Groups to be used for other purposes.

Assign permissions via tutorial groups.

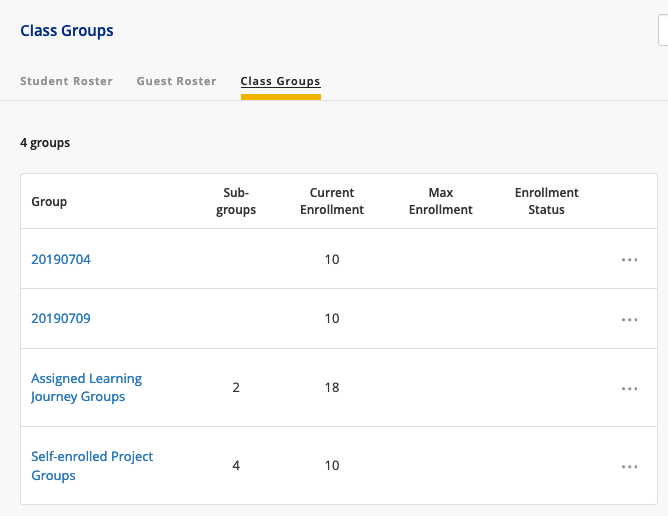
That’s plural – purposes – because Class Groups no longer are limited to a single purpose. By using sub-groups, you are able to create different types of groups within the module.

Class groups - sub-groups

8. Non-NUS Guests

You can add non-NUS or external Guests using just their email address. When you do so, LumiNUS will invite them to join the module. They will be able to log in via their social media accounts or by creating an account with LumiNUS.

Here is how you invite a non-NUS user. See the perspective of the person you invite.

Note: NUS Guests can still be added to your module. They should  be added via their NUSNET IDs.

9. Learning Flow

Learning Flow

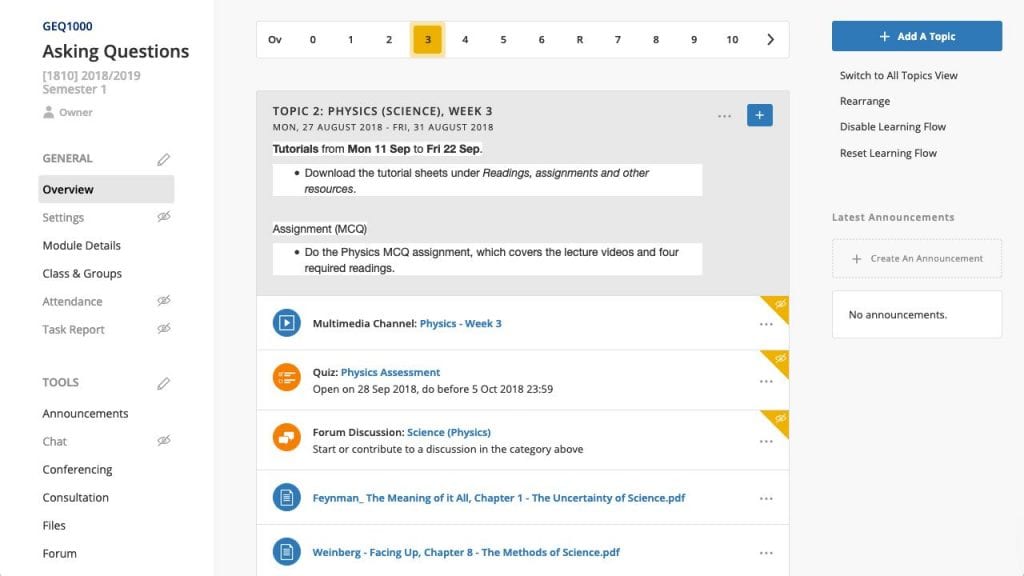
Lesson Plan is now Learning Flow. If you enable Learning Flow, you will notice that it is no longer a separate tool. It is integrated into the Module itself. If you follow the official Academic Calendar, Learning Flow highlights the particular week. For example, if it is Week 3 of semester, your students will see Week 3 of the Module when viewing it in LumiNUS. Also, you can now directly add submission folders to Learning Flow.

This is an overview of nine major changes in LumiNUS, and the descriptions may not suffice. You can find out more by getting in touch with us face-to-face or by joining our workshops.

Leading up to LumiNUS

We are fast approaching the new Academic Year. If you have not started to prepare your modules in LumiNUS for the coming semester, we urge you to begin soon. As announced in the LumiNUS newsletter, online seminars and roadshows, IVLE goes into staff-only mode on Sunday 4 August.

Quick steps

The fastest way to get onto LumiNUS is to use the IVLE to LumiNUS migration tool. The link lists all the information you need to know before opting for migration as well as the migration application form.

Important notes:

  • The migration process runs in a queue, not in parallel. This means: first-come, first-served. The migration process is resource intensive, so it has to be done a module at a time. Please do not leave this to the last minute and expect that your module(s) is/are copied over to LumiNUS immediately.
  • You need to be the owner of the module to request for migration. If this is an issue, you can transfer ownership to the person who is (or will be) actively managing the module in IVLE/LumiNUS.
  • The migration does not include all content and settings. Please read what will and will not be copied over to the module in LumiNUS. You should verify that your module has been copied to LumiNUS correctly once you are notified that the migration is complete.


Learn more

We encourage you to learn more about LumiNUS. CIT will be holding consultations (online and walk-in) and First Steps workshops from now until the start of semester.

Online consultations

On weekdays from now until Friday 12 July, you can join an online consultation for LumiNUS.

Please visit Online Consultations on the LumiNUS Information site for information on how to join, the latest updates and block-out dates.

Walk-in consultations

From Monday 15 July to Thursday 15 August, CIT will hold walk-in consultations at CIT Seminar Room, Level 3 of Information Technology building.

Please visit Walk-in Consultations on the LumiNUS Information site for latest updates and block-out dates.

First Steps with LumiNUS workshops

As this is the first time many of you will be using LumiNUS, we will hold several First Steps with LumiNUS workshops.

As spaces are limited, registration is required.

  1. Thu 4 Jul, 1400 to 1600 hrs
  2. Tue 9 Jul, 1000 to 1200 hrs
  3. Tue 16 Jul to Thu 18 Jul (various times): LumiNUS workshops at CDTL.
  4. Mon 22 Jul, 1000 to 1200 hrs
  5. Wed 24 Jul, 1400 to 1600 hrs
  6. Fri 26 Jul, 1000 to 1200 hrs
  7. Tue 30 Jul, 1000 to 1200 hrs
  8. Thu 1 Aug 1400 to 1600 hrs
  9. Mon 5 Aug 1400 to 1600 hrs
  10. Wed 7 Aug 1000 to 1200 hrs

The LumiNUS First Steps workshops will be held at CIT Seminar Room, Level 3 of Information Technology building.

Further help

Self-starters can refer to the LumiNUS Staff Guide.

You can also refer to the LumiNUS information wiki. This highlights what is new as well as differences between LumiNUS and IVLE.

If you want to ask questions, report bugs or make suggestions, please do so at the LumiNUS Staff Help Desk (NUSNET login required).

Content, content, content

While pedagogy has advanced, teachers still need ways of providing content to students. Be it normal or flipped classrooms, students need to prepare by reading and watching content before class. In this edition, we look at the ways you can upload learning materials for your students in LumiNUS.


Files (upload)
Drag and drop for bulk upload.
Students download their learning resources from Files. How you make your materials available to students to download remains much the same.

The biggest change is that you can bulk upload in fewer clicks. In the past, you had to click through a single-file upload mode, then a three-file upload mode to get to the massive-upload mode.

Now, you can Ctrl-click (Win) or ⌘-click (Mac) to select many files for bulk upload. And there is an even simpler way: select your files and drag-and-drop them to the folder where you want to place them.

There are a few important changes to Files submission folders. We will cover this in a future edition dedicated to assessing student work in LumiNUS.


Multimedia & Web Lectures

You can choose whether to upload videos to LumiNUS or MediaWeb/Panopto channels. Each channel has its advantages.
YouTube video in Multimedia - click for a larger screenshot.
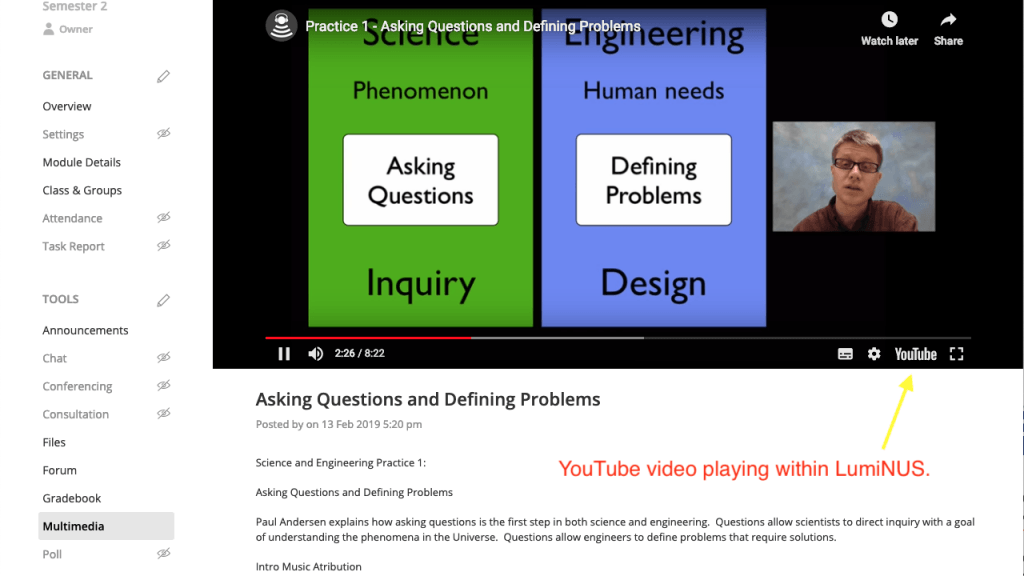
LumiNUS channels allow you to include YouTube links. LumiNUS plays YouTube videos inline. So, there no related videos on the sidebar to distract your students. The video’s title and description are auto-added to LumiNUS too.
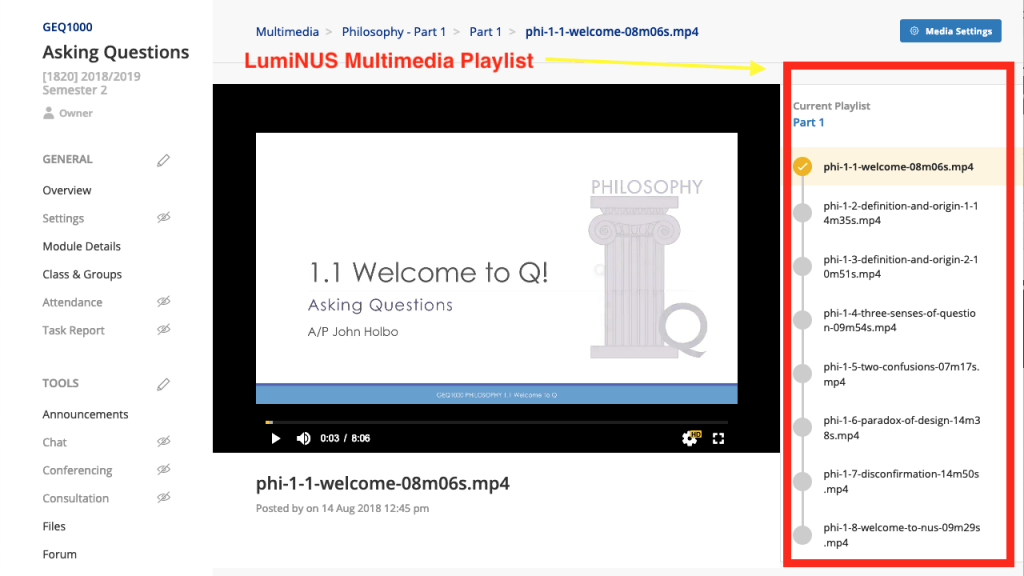
Multimedia playlist - click for a larger screenshot.
Besides this, you can create playlists in LumiNUS channels. This allows students to watch a series of videos in the order you choose. Playlist videos autoplay, so students can watch a set of videos without interuption. The next video starts immediately after the previous one ends.

Also, you can intersperse YouTube content with your own videos in playlists.
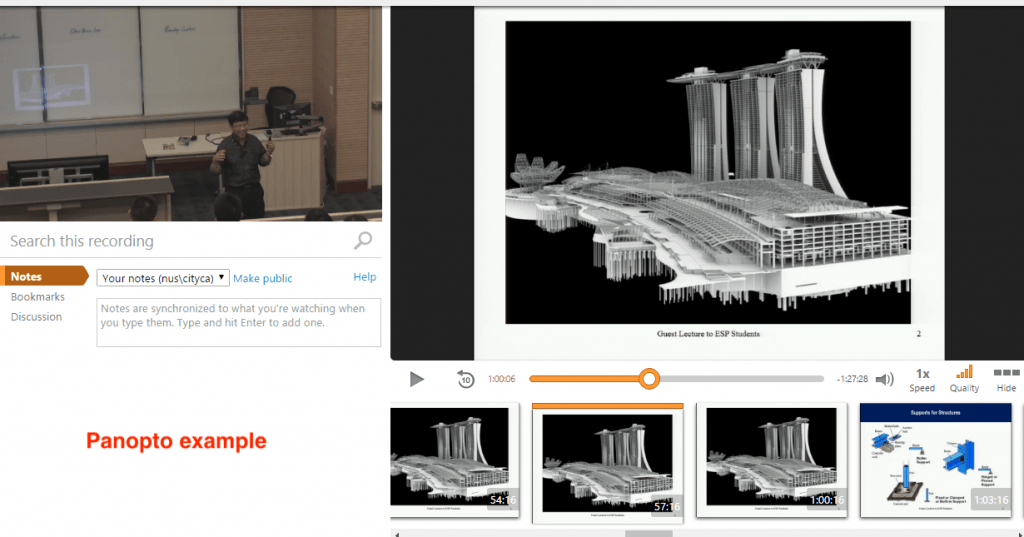
Panopto - click for a larger screenshot.
While MediaWeb/Panopto channels do not allow YouTube links, they have other advantages.

First, if you record using Panopto, it indexes your presentation slides and your recorded audio. If you are familiar with Breeze/Adobe Presenter, this is similar. Panopto produces a video which can students can navigate via slide titles and thumbnails.

Panopto also tries to detect text in your presentation slides. This lets viewers search for content in your video. Let’s say your students want to revise a certain concept. All they have to do is search, and Panopto will bring them to the point in the video where the search term appears.

Panopto attempts to do the same with the audio. So, if you mention something, it will hopefully be searchable. “Hopefully” because speech-to-text can be a hit-or-miss affair.

Speaking of Panopto, the same service powers Web Lectures.

You can publish Web Lectures almost immediately after you record them.

The Web Lecture recording process remains the same. Please remember that semester-long Web Lecture recording requests should be made before the start of semester.

Ad-hoc requests also need advance notice, and you must have already booked the venue.


Content Banks

There are two content banks in LumiNUS: Question Bank and Rubric Bank.

The Question Bank allows you to store questions for use in the Quiz and Survey tools.

If you have a large repository of questions in IVLE, you can export them as QTI files. You can import the QTI files into the LumiNUS Question Bank.

The Rubric Bank works with the new Rubric feature in Quiz and Gradebook. You can store rubrics for use when you are marking essay questions and grading assignments. We will cover this new feature in a future newsletter edition on assessing students.

You may be wondering – what happened to the Guest Bank and the Multimedia Bank?

The Guest Bank has been renamed as Guest & Groups. However, this will be discontinued soon since non-NUS accounts creation will be handled by NUS IT.

As for the Multimedia Bank, it has been removed to streamline video workflow. Instead of a manually organised bank, the title of every video you have uploaded to LumiNUS is searchable. Name your videos descriptively and accurately when you upload them. Then, you should be able to find the videos and add them to your module’s Multimedia folder.
Starting at the beginning – the Module


Module – important notes

Modules - click for larger screenshot.

The Module is where you will find most tools in LumiNUS.

There is a big change in the way Modules work: you cannot change the Academic Career and Term once you have created the Module. There are a few reasons for this, but the main one is something we are working on for the future – learning analytics.

This has two implications:

  1. If you created the Module for the wrong semester, you cannot change the Academic Career and Term. You need to create a new Module with the correct term/semester and duplicate the tools into the new Module. You may also want to delete the Module with the wrong semester/dates to avoid confusion.
  2. You must create a new module for each semester. We are aware that some staff update the term/semester and the dates, re-using the same Module for the next semester. Now that this is not possible, you should create a new Module and duplicate the tools into the new Module.

Other than this, Modules can now be open to lifelong learners (L3 module) or be set as a non-academic module, open to any NUS students or staff to enrol.


Module Overview

Module overview - click for larger screenshot.

The Module Overview – the default landing page – offers space for a brief overview of the module. If you have a module trailer, it is shown here.

If you have enabled Learning Flow (and used the NUS Academic Calendar format), the default landing page for you and your students will be the current week of the semester. That is, you and your students will see the resources and activities that you have chosen for that week.

The  detailed Module Description is now found under Module Details on the sidebar.


Module Details

Module details - click for larger screenshot.

You can find the Description, Facilitators, Readings, Weblinks , Timetable and Library Resources under Module Details on the sidebar.

The Description contains sections which can be rearranged and published/unpublished independently. Besides default sections populated from NUS Bulletin and EduRec, you can also create custom sections. The Description and other Module Details remain mostly unchanged.


Class & Groups

Assign permissions via tutorial groups.

Class & Groups features two major changes.

Assigning permissions to tools by Tutorial Groups used to be a multi-step, partly manual process.

You had to create Class Groups from Tutorial Groups. Then you had to email CIT to let us know that you wanted the groups to be synced. Otherwise, it would be a one-time export from Tutorial Groups to Class Groups.

Now, you simply assign permissions using the Tutorial Groups themselves.

No extra steps.

The other major change is that Class Groups can now have sub-groups. This will enable you to create different types of groups within the class for different purposes.

For example, you can have Project Groups parent folder with the sub-groups being the individual Project Groups. You can also have a Learning Journey Group with the sub-groups being the different learning journey times/dates.

With sub-groups, you can organise different types and sizes of groups easily.


Task Report

Task report - click for larger screenshot.
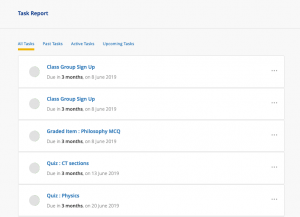
A new feature is the Task Report. This gives you an overview of all the deadlines for your module.

You can also send your students a reminder about these tasks via Task Report.


One last thing…

Show or hide tools.

You can hide the tools on the sidebar. This may be useful if you don’t want to show students certain tools or if you have set up Learning Flow and want them to use it exclusively.