My friend, Sherry, tried using the iNaturalist app and wrote a user-guide. Even though we have to be “one step away from people” during this difficult period, as long as we have the internet, we still can be “one step closer to nature”!
Sherry is the strong and talented dance captain of The Lion King -UK & Ireland Tour. She returned to Singapore in end-March 2020, and was tested positive for covid-19 (you can read about her experience here). She has since recovered and is enjoying her time using the iNaturalist app.
What is iNaturalist?
![]()
the iNaturalist logo
iNaturalist is an app that allows you to record observations of any organisms (both plants and animals) that you find. Don’t worry if you don’t know what these plants and animals are! The app uses algorithms to help identify these organisms. At the same time, expert identifiers also go through your observations to help with the identification.
Using the different features of the app, you can get to know other nature enthusiasts, contribute to the biodiversity data of your surrounding environment, and who knows, you might even discover a new species of animal!
Take this time of social/safe/physical distancing to get closer to nature, discover more about nature around you with the help of this app.
Step-by-step guide to using iNaturalist
Getting started
- Download iNaturalist for free from the Google Play Store or the Apple App Store. The icon for the app should look like this:

icon of the iNaturalist app
- Log in with Facebook, Google or your email address and you will come to this page. You are ready to make your first observation!
- Click on the “+” sigh (see the red arrow below):


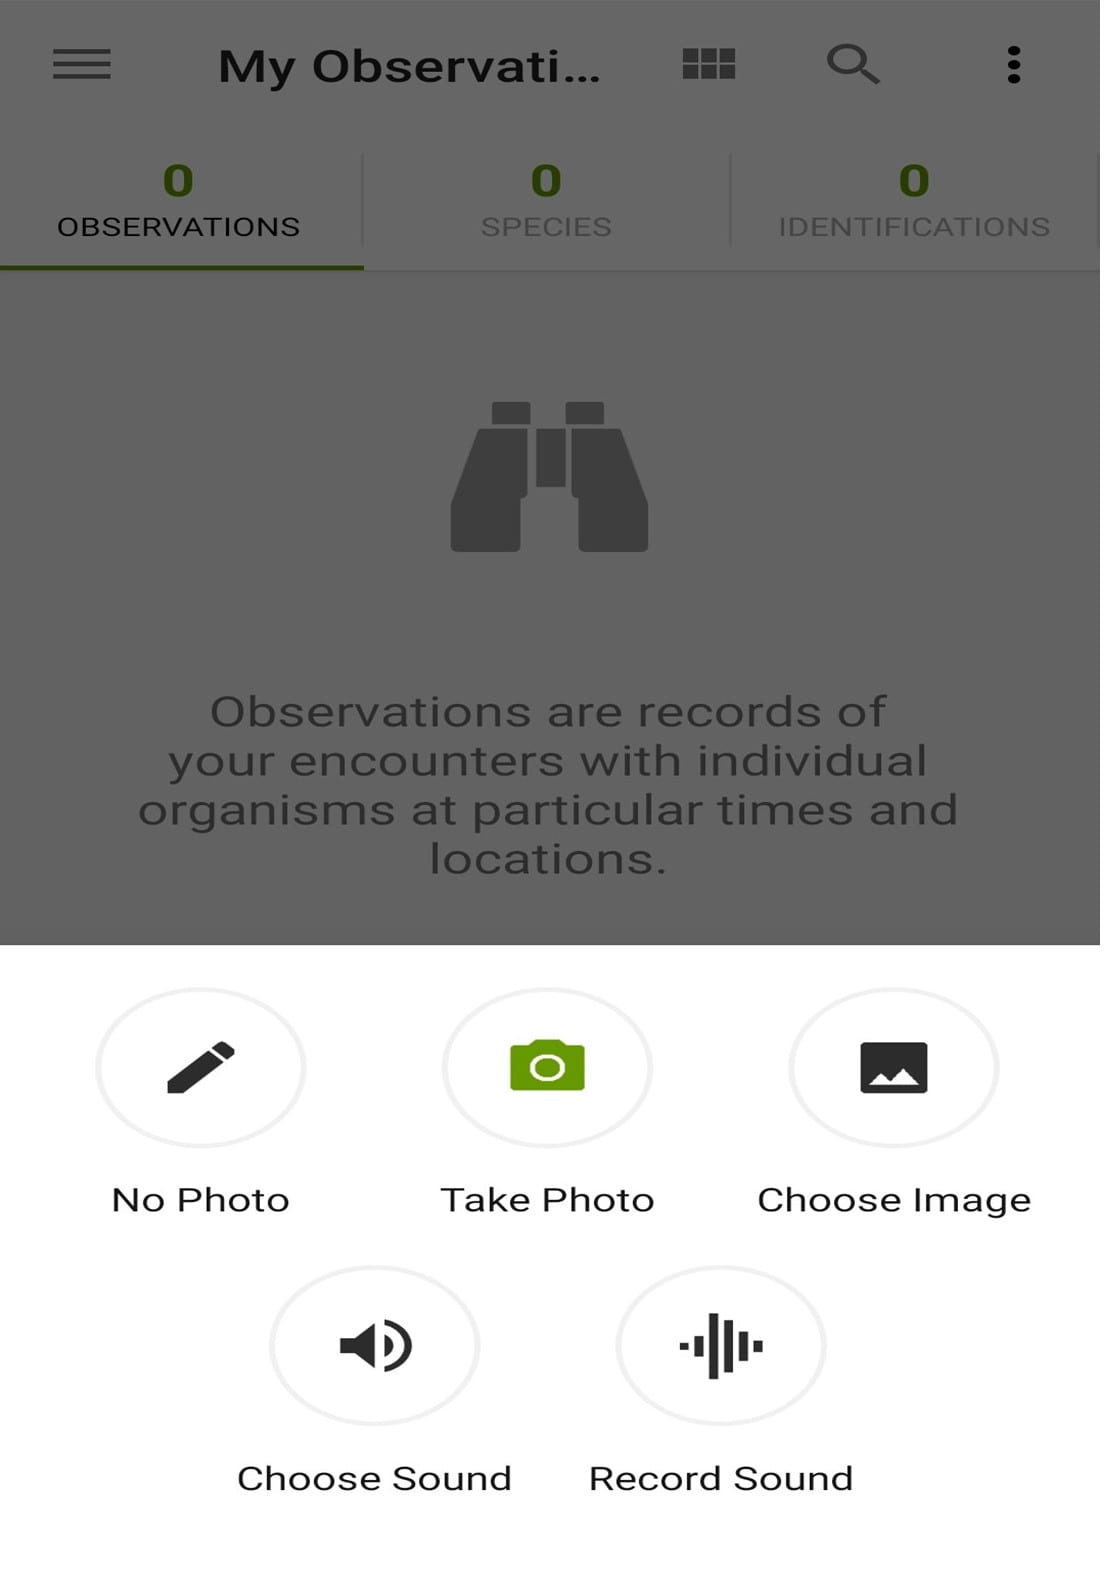
- This box will appear for you to choose how you want to record your observations. You can take a photo of the animal/plant now, or you can upload a photo that you have taken previously as long as you remember the date and the location of your observation.
Recording your observation
- Add more pictures by clicking on this camera box (refer to the purple arrow).
- Take pictures from different angles; for plants you can zoom in to the different plant parts such as the leaves, flowers or fruits.
- For animals, take full body shots from different angles and close-up shots of its body parts.
- Once you have the pictures up, you can start identifying your organism! Click on the box ‘What did you see?’ (red arrow)
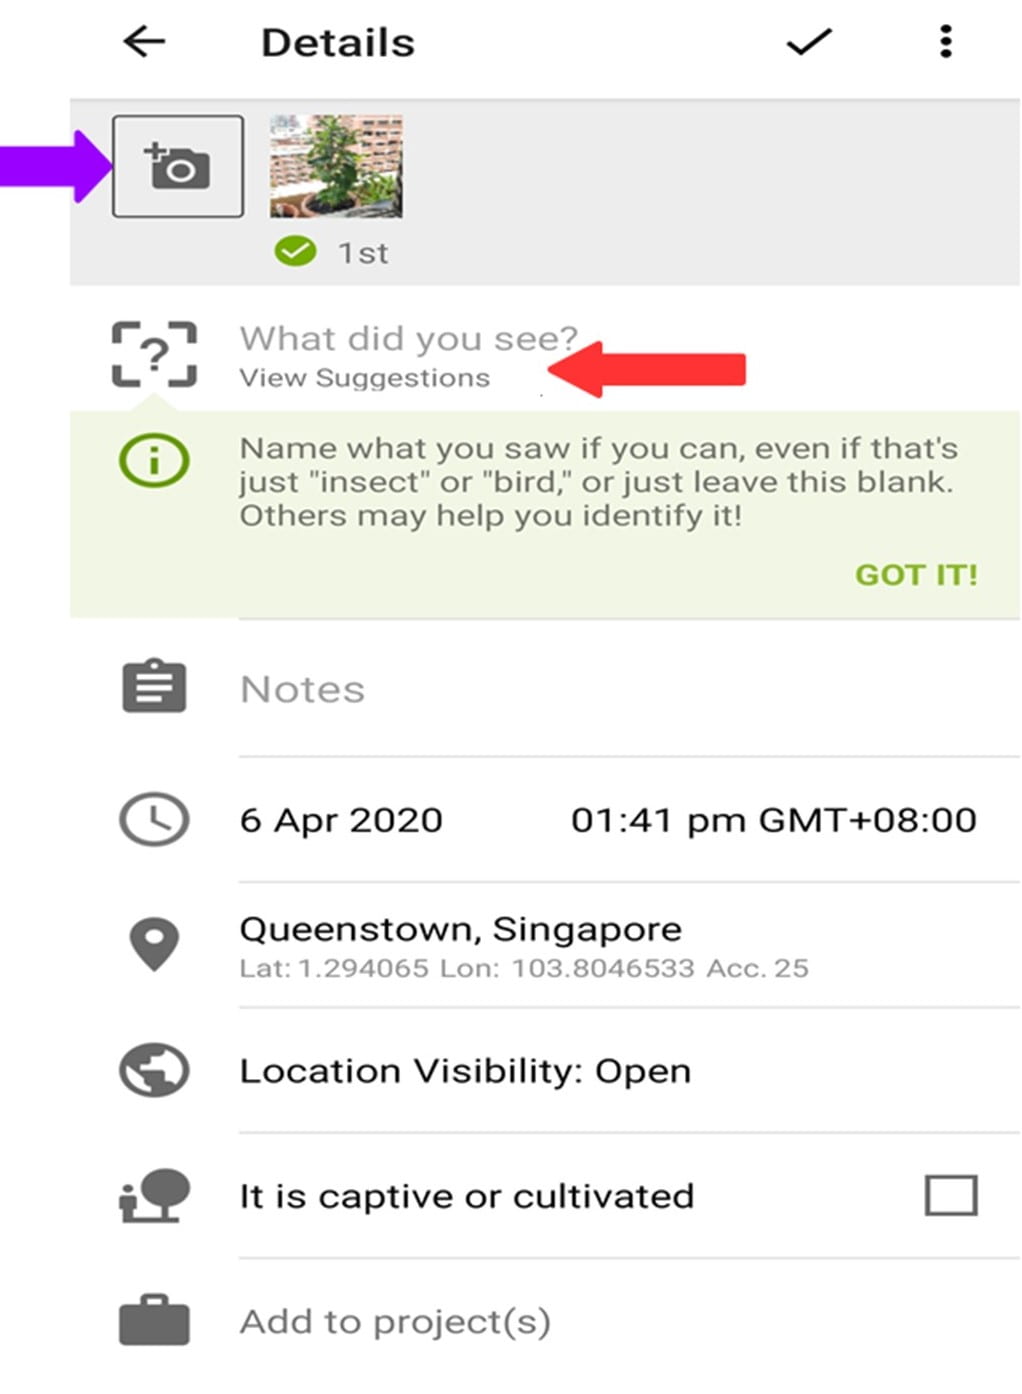
(P.S.: Make sure that you are maintaining a safe distance from the animal!)
- The app will give you a list of species suggestions and you can scroll down the page to choose. You can click on the various species for more pictures and information to decide what to choose.
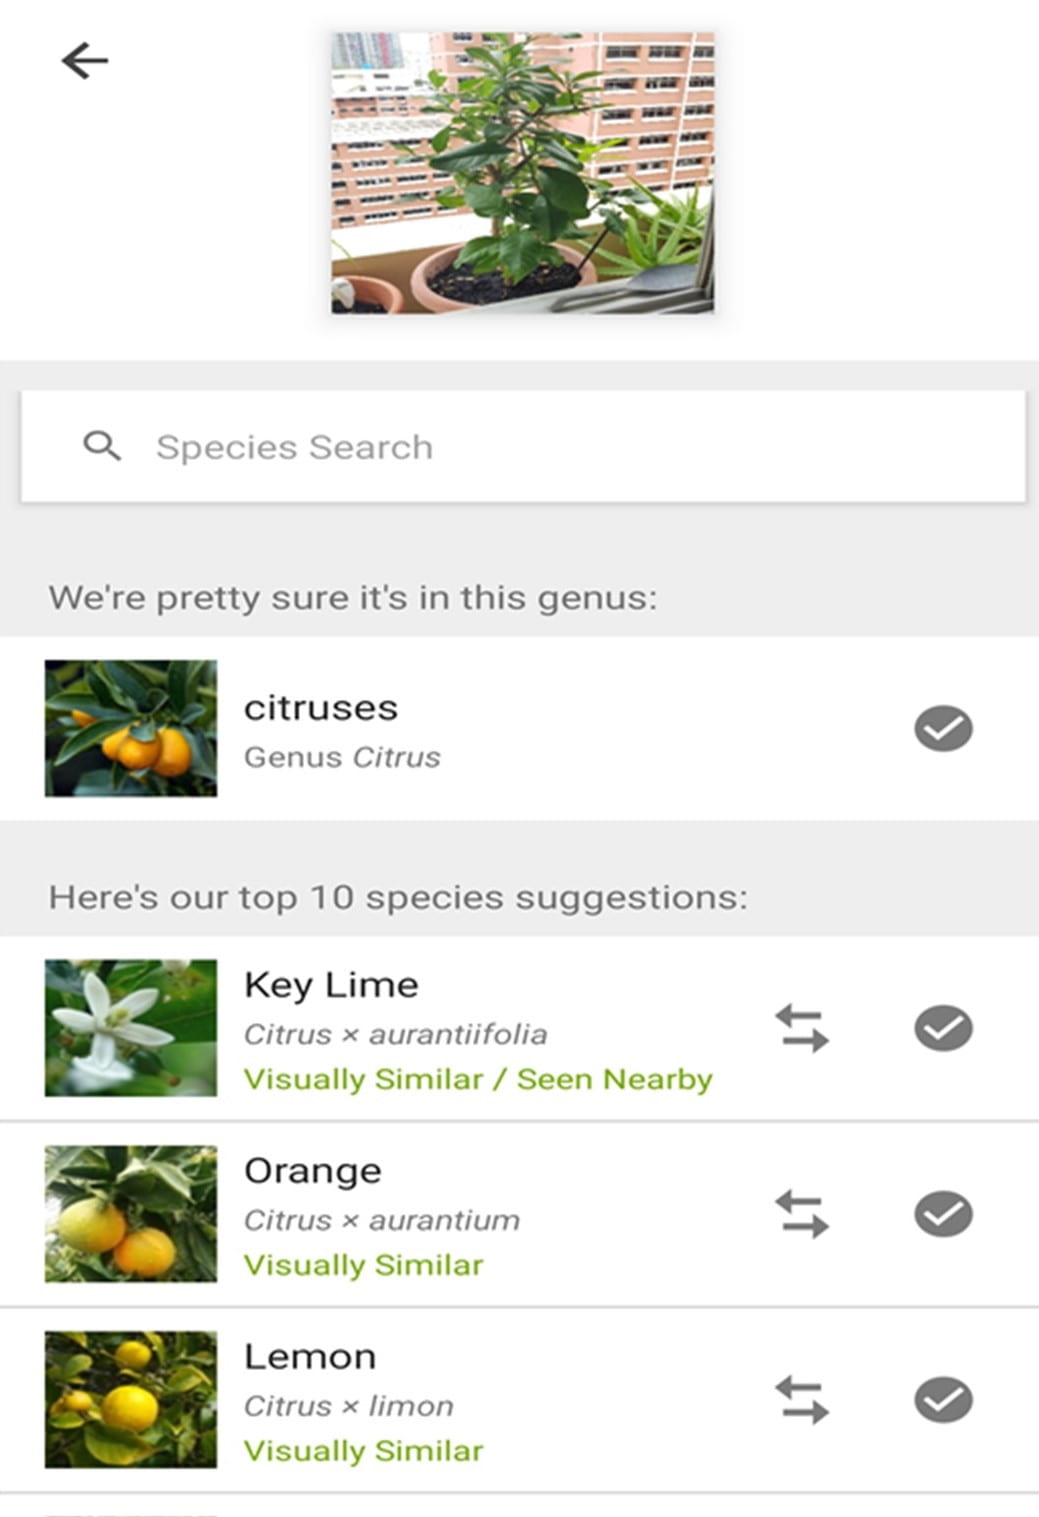
- This is the information page of the suggested species. Swipe on the image to see more photos.
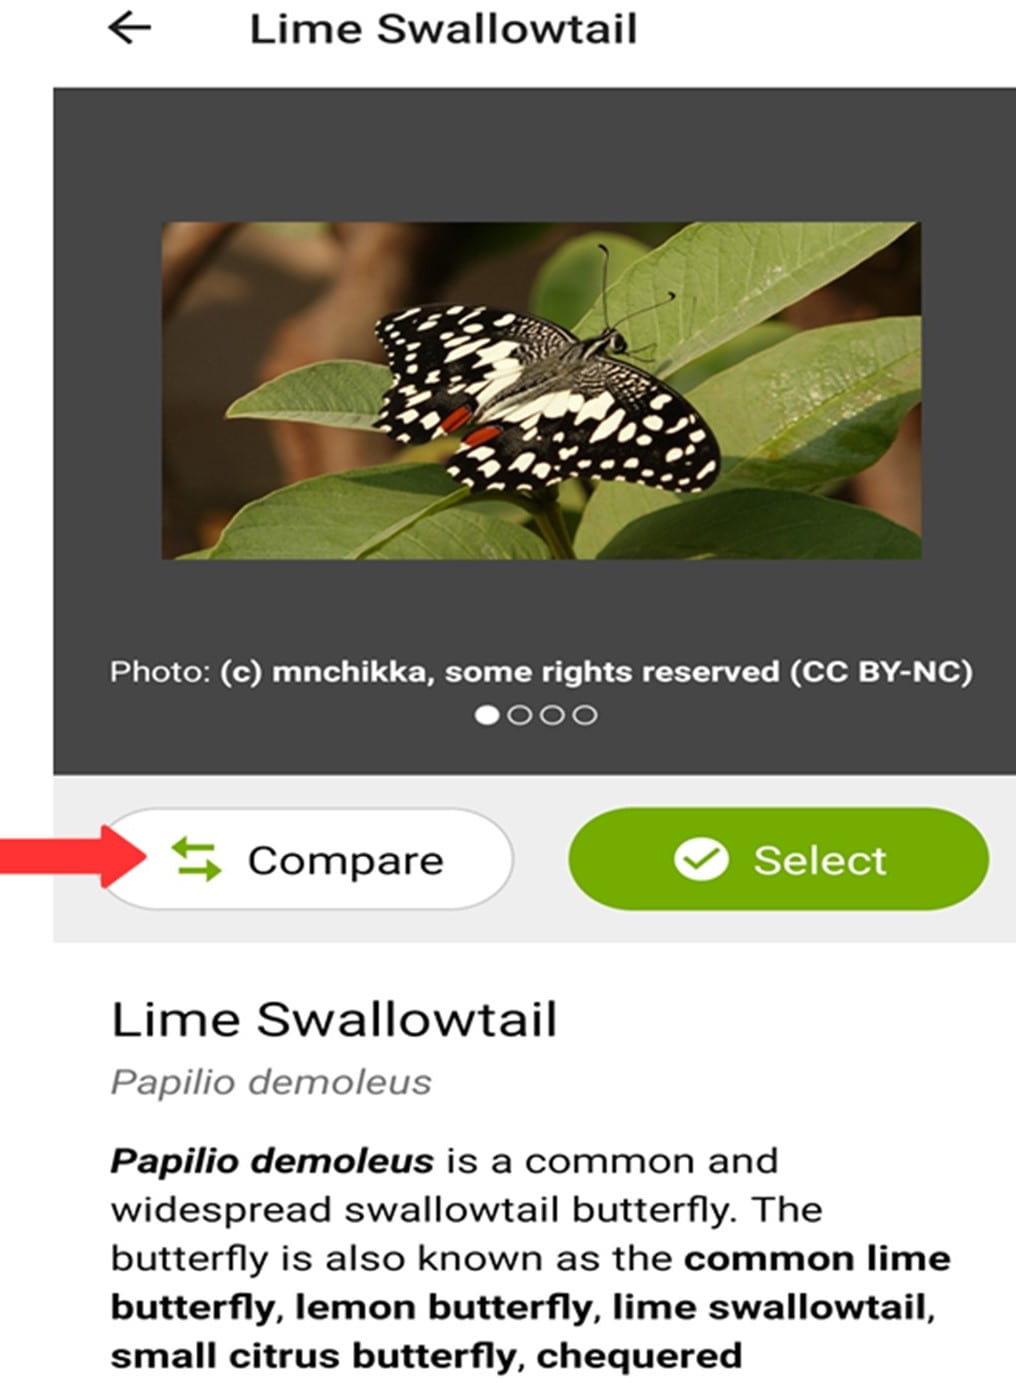
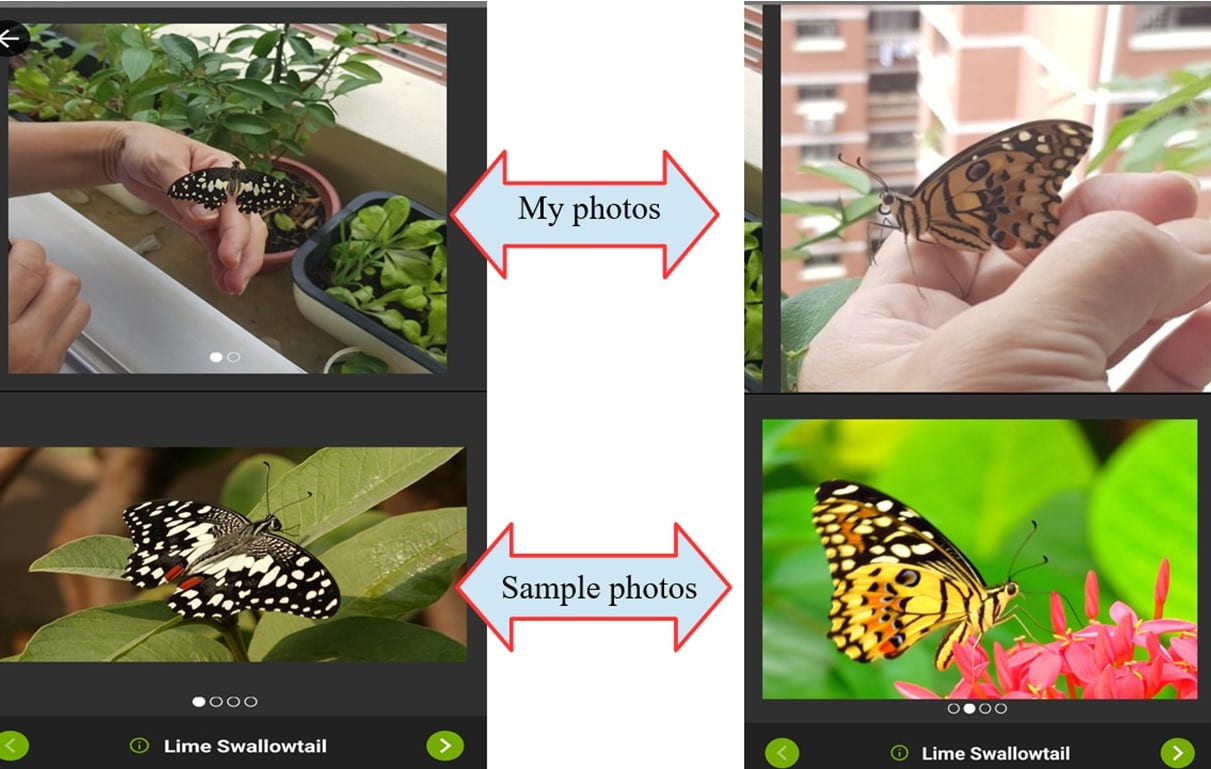
- You can also click on ‘Compare’ (red arrow) to bring your photo next to the sample photo from the guide as shown in the 2 pictures below.
- You can zoom in for both pictures to have a closer look of the features of the organism. Swipe on the images to compare the your photos with the ones in the guide. Click on the green arrows at the bottom to switch to another species.
- If you are still uncertain, don’t worry! You can simply select the organism’s genus and the iNaturalist community will help you with identification.
Adding important information
- You can add notes to your observations (refer to the red arrow).
- The date, time and location (blue arrows) should have been automatically recorded if you took the photo using the app. If you uploaded an old picture, you have to manually input these information.
- Tick here (purple arrow) if this organism does not occur at this location naturally. For example, this plant was grown by my mother, therefore it is cultivated. Captive animals include pets and farm animals.

Your growing collection of observations
- As you collect more observations, your page will start to fill up!
- These symbols turn pink whenever you get a new identification from the iNaturalist community, and the number indicates the number of identifications for each of your observations.

How do I know that my observations are useful for scientific research?
- The Data Quality of your observation is determined by how accurate, complete and suitable it is to share to data partners.
- First you need to have a verifiable observation; meaning that your observation:
- has a date,
- has a location,
- has photos or sounds and
- is not a captive or cultivated organism.
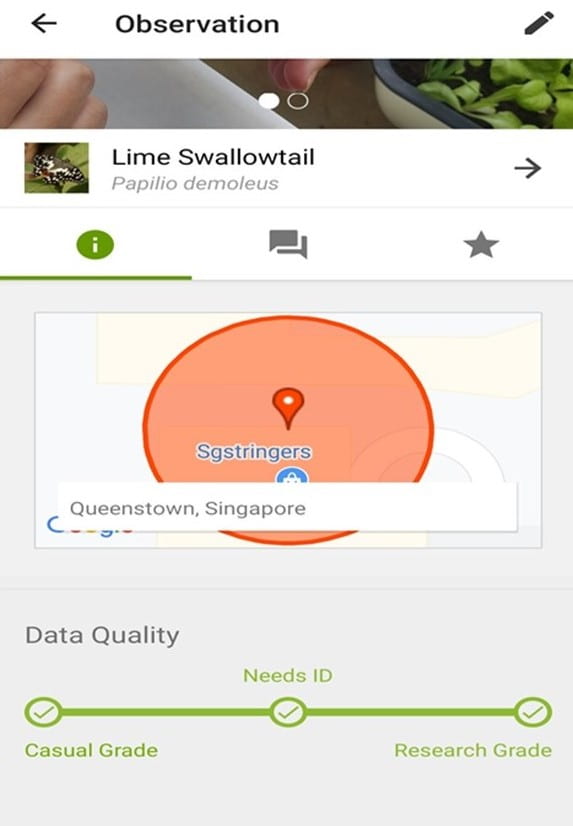
- To start with, any observations that meet the above criteria (i.e. are verifiable) are labelled “Needs ID”.
- When 2 or more identifiers agree on the species, your observation becomes “Research Grade”. For example, there were 3 people who agreed that my butterfly is a Lime Swallowtail.

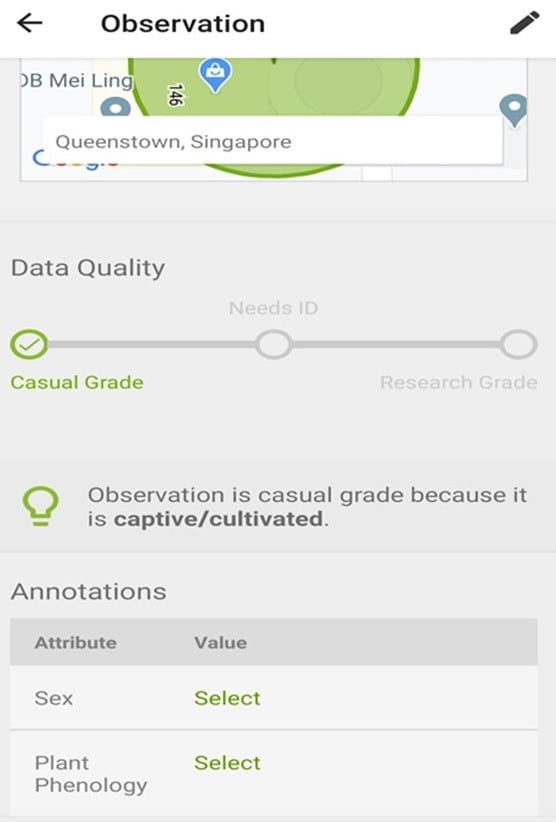
- Your observation becomes “Casual Grade”, if the organism is captive or cultivated, for example fore for my Lemon plant (see below). Other reasons may be that your observations are not verifiable.
What other fun things can I do with iNaturalist?
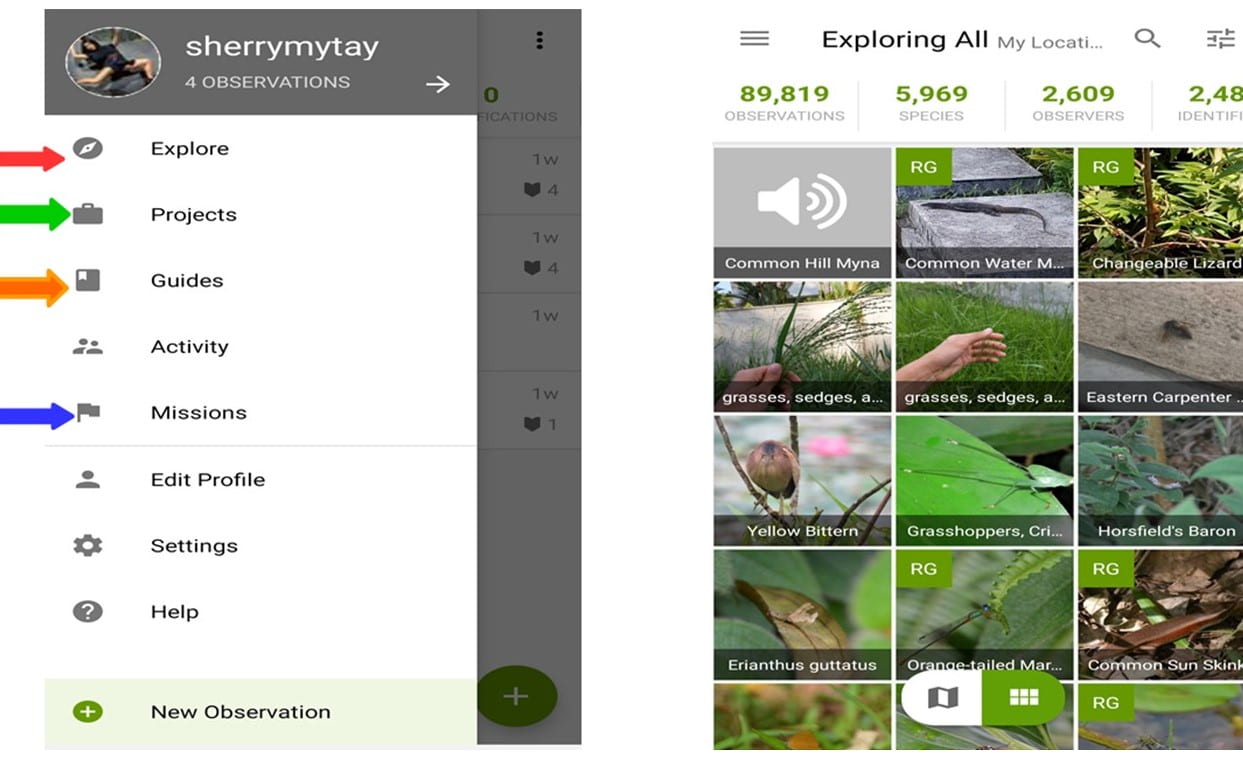
- Explore (red arrow): Clicking on that brings you to the page shown in the top right picture. You can check out the observations of other users in your area and help identify the organisms!
- Projects (green arrow): Find projects that you are interested in and contribute your observations into their database.
- Guides (orange arrow): If you are interested in exploring further afield from the comfort of your home, then this is the place to discover the stunning diversity of wildlife around the world!
- Missions (blue arrow): In case you do not know where to start, this feature gives you suggestions of organisms closeby to look for (bottom left picture) and even show you locations of where they have been spotted previously (bottom right picture). This is an example from Singapore!

Take this time to explore nature around you: whether in your garden or when you go outdoors for a quick exercise! Have fun connecting with nature!
Leave a Reply