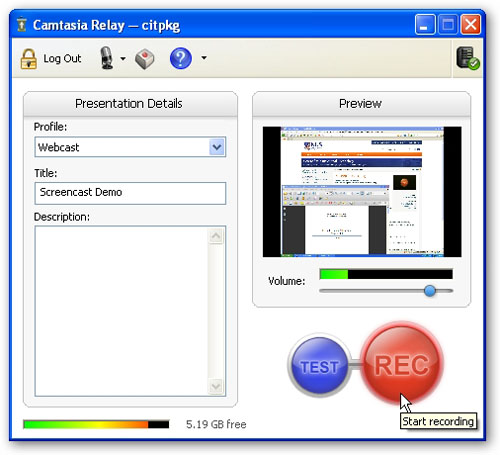
Camtasia Relay is now available to all lecturers for your screen recording needs. Screen recording, also known as screencasting, allows you to record your computer desktop as well as your audio narration. Anything which can be displayed on your computer screen can be recorded.
For example, you might display your lecture notes in PowerPoint, Acrobat or Keynote while recording accompanying audio to create a standalone lecture video that will be uploaded to IVLE. You have the flexibility of switching to a web browser to point out a relevant website or bringing up a programme to demonstrate how to use it.
Screen Recording 1, 2, 3
The process of screen recording is simple. After registering for a Camtasia Relay account, you can log in and download the recorder software. There are Windows and Mac versions, as well as a portable version that can be installed on a thumbdrive, for use on any Windows or Mac computer.
Once the recorder software is installed, you can start creating your screen recording. The recorder software will start recording everything that goes on on your computer screen together with your audio narration.
When you are done, stop the recording. You can preview the recording and trim the ends of the recording. If you are happy with what you have produced, you can submit it to the server. There, it will be encoded and compressed, then published to IVLE (if it is a lecture screen recording).
Quick Tips
- Create keyboard shortcuts so that you don't need to display the Camtasia Relay software on screen whenever you need to pause or when you are going to stop.
- Keyboard shortcuts to switch between different software are also useful, if you are showing multiple sources: Alt+Tab in Windows, Cmd+Tab in Mac.
- Leave ample space on your hard disk as the screen recording records to your hard disk first.
- Keep recordings to below 30 minutes per segment, so that the video is easier to upload.
How is Camtasia Relay different from Breeze?
Readers who are familiar with CIT service might notice that screen recording is somewhat similar to DIY Courseware using Breeze. The table below highlights the differences between the two.
| Screen Recording
with Camtasia Relay
|
DIY Courseware with Breeze
|
|
| Summary | Create simple audio-visual presentations showing slides, websites, software - anything on your desktop. | Create self-supported online PowerPoint presentations with audio and simple interactivity. |
| Output | Video of computer desktop with narration hosted on NUS server, published to IVLE. | Flash-based online PowerPoint slides with narration hosted on NUS server, published to IVLE. |
| Requirements (authoring) |
|
|
| Requirements (viewing) |
Internet connection; any program/application which can play AVI videos. | Internet connection; any Flash-enabled browser (Windows/Mac). |

